Hand Tracking in Vision Pro Simulator

There’s currently (as of Xcode 15 beta3 VisionOS SDK 1.0) no way of testing or simulating hand tracking in the Vision Pro Simulator. In fact, many of the Recognizers, the bridges between the real world and our apps, that will unlock many of the engaging Spatial experiences don’t (yet?) exist in the Simulator.
To combat this I have been experimenting with using Playgrounds on the iPad to get a feel of how scene, plane, hand and body tracking would work. This works really well for prototyping and is a super responsive workflow. Changes can been seen “instantly” in the preview and the ability to take the iPad anywhere (and make changes from anywhere) is important for AR. This workflow falls short with replicating the experience of running an app on the Vision Pro as Playgrounds doesn’t have the Vision SDK (understandable, it’s unlikely to), or even the latest iPadOS 17 features. (I’m hoping for an updated Playgrounds app soon).
Experimenting
I was experimenting with running a customML object detection model on a video playing within the Vision Pro. It happened that code snippet I found for extracting the frame buffer included a CIFilter step. That got me thinking about hand tracking, and if I could bring a form of hand tracking in the Simulator.
Thanks to same Apple sample code and a the work I’d already done on the iPad with VNHumanHandPoseObservation, along with some careful camera placement I was able to fake hand tracking, in 2D, on the simulator.
So how does this magic work? Here’s how it looks from another angle, without the green screen effect:
There are three parts to this, one the video, two the video filter and three the hand detection.
Video
First I recorded a clip of just my hand, on a “green screen” (my practice putting mat) and imported that into the Xcode Project (After first resaving it to remove the HDR element as that seemed to mess up playback).
Using AVFoundation and an AVPlayer in a UIViewControllerRepresentable I was able to get video playback, but in a way I could also add a hook to the AVPlayerItemVideoOutput necessary to access the frame buffer for the video.
struct PlayerView: UIViewControllerRepresentable {

    @Binding var url: URL?

    func updateUIViewController(_ uiView: UIViewController, context: UIViewControllerRepresentableContext<PlayerView>) {
    }

    func makeUIViewController(context: Context) -> UIViewController {
        let view = PlayerUIView(frame: .zero,
                                url: $url)
        let controller = PlayerController()
        controller.view = view

        return controller
    }
}
class PlayerUIView: UIView {
private let playerLayer = AVPlayerLayer()
private let _myVideoOutputQueue = DispatchQueue(label: "VideoFrames", qos: .background, attributes: .concurrent, autoreleaseFrequency: .workItem, target: nil)
lazy var displayLink: CADisplayLink = CADisplayLink(target: self, selector: #selector(displayLinkDidRefresh(link:)))
var player: AVPlayer
var videoOutput: AVPlayerItemVideoOutput
@Binding var url: URL?
required init?(coder: NSCoder) {
fatalError("init(coder:) has not been implemented")
}
init(frame: CGRect,
url: Binding<URL?>,
handObservable: HandObservable) {
_url = url
// Setup the player
player = AVPlayer(url: url.wrappedValue!)
let settings = [ String(kCVPixelBufferPixelFormatTypeKey): kCVPixelFormatType_32BGRA ]
let output = AVPlayerItemVideoOutput(pixelBufferAttributes: settings)
self.videoOutput = output
super.init(frame: frame)
playerLayer.player = player
playerLayer.videoGravity = .resizeAspect
layer.addSublayer(playerLayer)
attachVideoComposition()
player.currentItem?.add(output)
displayLink.add(to: .main, forMode: .common)
// Start the movie
player.play()
}
}This is mostly boilerplate, but the important pieces of code here are hidden in ‘attachVideoComposition’ for adding the alpha along with the displayLink setup for processing the individual frames with Vision.
Filter
The attachVideoComposition function creates a CIColorCube filter, which converts anything of a certain colour hue (in our case green) to alpha.
private func attachVideoComposition() {
        //remove green hues
        let chromaCIFilter = self.chromaKeyFilter(fromHue: 0.2, toHue: 0.5)

        if let playerItem = player.currentItem {
            let asset = playerItem.asset

            AVMutableVideoComposition.videoComposition(with: asset) { filteringRequest in
                let source = filteringRequest.sourceImage
                chromaCIFilter?.setValue(source, forKey: kCIInputImageKey)

                // Apply CoreImage provessing here
                filteringRequest.finish(with: chromaCIFilter?.outputImage ?? source, context: nil)
            } completionHandler: { composition, error in
                playerItem.videoComposition = composition
            }
        }
    }
The filter itself is directly taken from Apple’s sample code here, which couldn’t have been more perfect for what I needed.
That gave me a nice transparent version of the video, once I’d tweaked the `fromHue` and `toHue` values to something that matched my specific green.
The player view is loaded in a simple SwiftUI View within the project, that loads the local video file on the press of a button.
struct VideoViewDemo: View {

    @State private var url: URL?

    var body: some View {
                ZStack {
                    if url != nil {
                        PlayerViewDemo(url: $url)
                    } else {
                        Rectangle()
                            .stroke(.green)
                            .frame(width: 326)
                        Button(action: {
                            url = Bundle.main.url(forResource: "IMG_2067", withExtension: "mov")
                            print("url:\(url?.absoluteString ?? "no file")")
                            }) {
                            Text("Play")
                                .font(.headline)

                        }
                    }
                }.edgesIgnoringSafeArea(.all)
    }
}
I’ve since come across a much more robust video playback example from Apple themselves and is a better starting point for video control than shown here.
The only other thing I needed to change was adding the .windowStyle(.plain) modifier to the WindowGroup, otherwise I still had the glass effect on the app’s window.
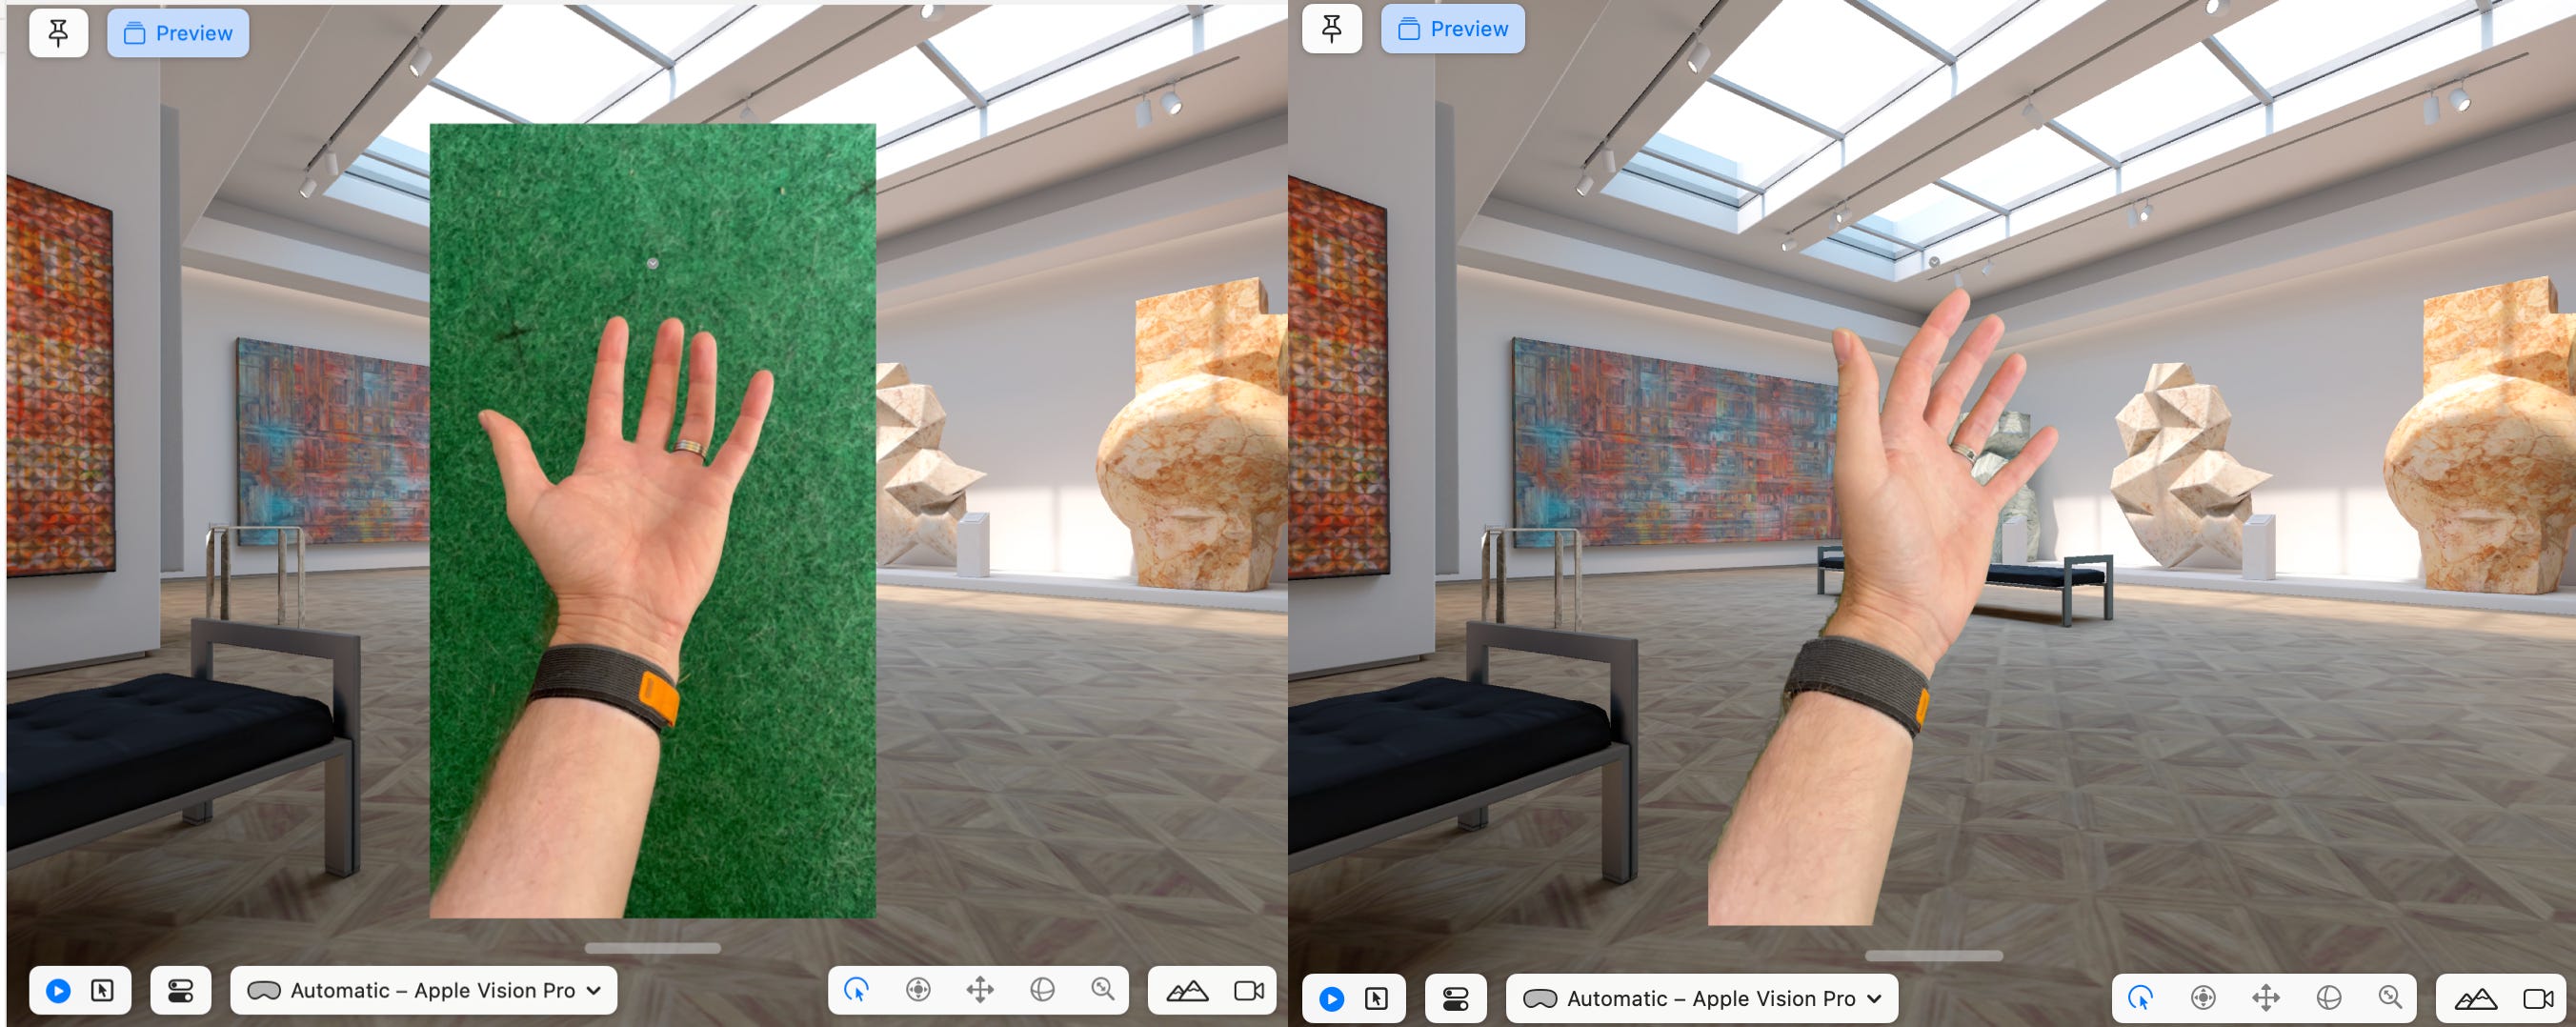
Here’s the result of the transparency side by side with the raw video:
VisionKit
That was pretty cool as it was, but I also wanted to see if I could run any of the confusingly named Vision detection algorithms on the video as well. This is an existing framework, dedicated to extracting clever things from images and video, unrelated to VisionOS, Vision Pro. That’s where the DisplayLink code comes in, which gives us notification every time a new video frame has been shown, and means we can extract a pixel buffer if it’s available. The code to do this is:
@objc func displayLinkDidRefresh(link: CADisplayLink) {
        let itemTime = player.currentTime()
        if videoOutput.hasNewPixelBuffer(forItemTime: itemTime) {
            var presentationItemTime: CMTime = .zero
            if let pixelBuffer = videoOutput.copyPixelBuffer(forItemTime: itemTime, itemTimeForDisplay: &presentationItemTime) {
                // process the pixelbuffer here
                processImage(pixelBuffer: pixelBuffer)
            }
        }
    }
With a pixel buffer available, which is one input that Vision can process, we are able to spin up a VNDetectHandPoseRequest, retrieve the observations, filter for those that have a high confidence, and finally store those in a location we can get to from the SwiftUI view. There’s a lot going on here, and I’ll dig more into the details of Vision and how the different detectors work in future posts, but it doesn’t take much code to get this working.
private var currentBuffer: CVPixelBuffer?

    func processImage(pixelBuffer: CVPixelBuffer) {
//the request can take longer than frames are sent to it, so only process one at a time
        guard currentBuffer == nil else {
            return
        }
        currentBuffer = pixelBuffer

        let handler = VNImageRequestHandler(cvPixelBuffer: pixelBuffer)
        DispatchQueue.global(qos: .userInteractive).async {
            do {
                let handRequest = VNDetectHumanHandPoseRequest()
                handRequest.maximumHandCount = 1
                defer { self.currentBuffer = nil }
                try handler.perform([handRequest])

                if let observation = handRequest.results?.first as? VNHumanHandPoseObservation {
                    let allPoints = try observation.recognizedPoints(.all)
// filter for high confidence observations
                    let filtered = allPoints.filter { observation in
                        observation.value.confidence > 0.5
                    }

//                    print("got hand: \(filtered.count)")

                    DispatchQueue.main.async {
//send to an observable class on the main thread
                        self.handObservable.handPoints = Array(filtered.values)
                    }
                }
            } catch {
                print("error: \(error.localizedDescription)")
            }
        }
    }
Lastly we take these observations and display them back to the user. One thing to note, is these observations are only in 2D, so of limited use for a full Vision application. The code here isn’t great, with some hardcoded values for the size of the window and video frame offsets. In reality you should convert the points from the Vision step (x: 0.0...1.0, y: 1.0...0.0) onto the video frame accurately, more on that in another post. But for this demo these value work well enough to get across the idea.
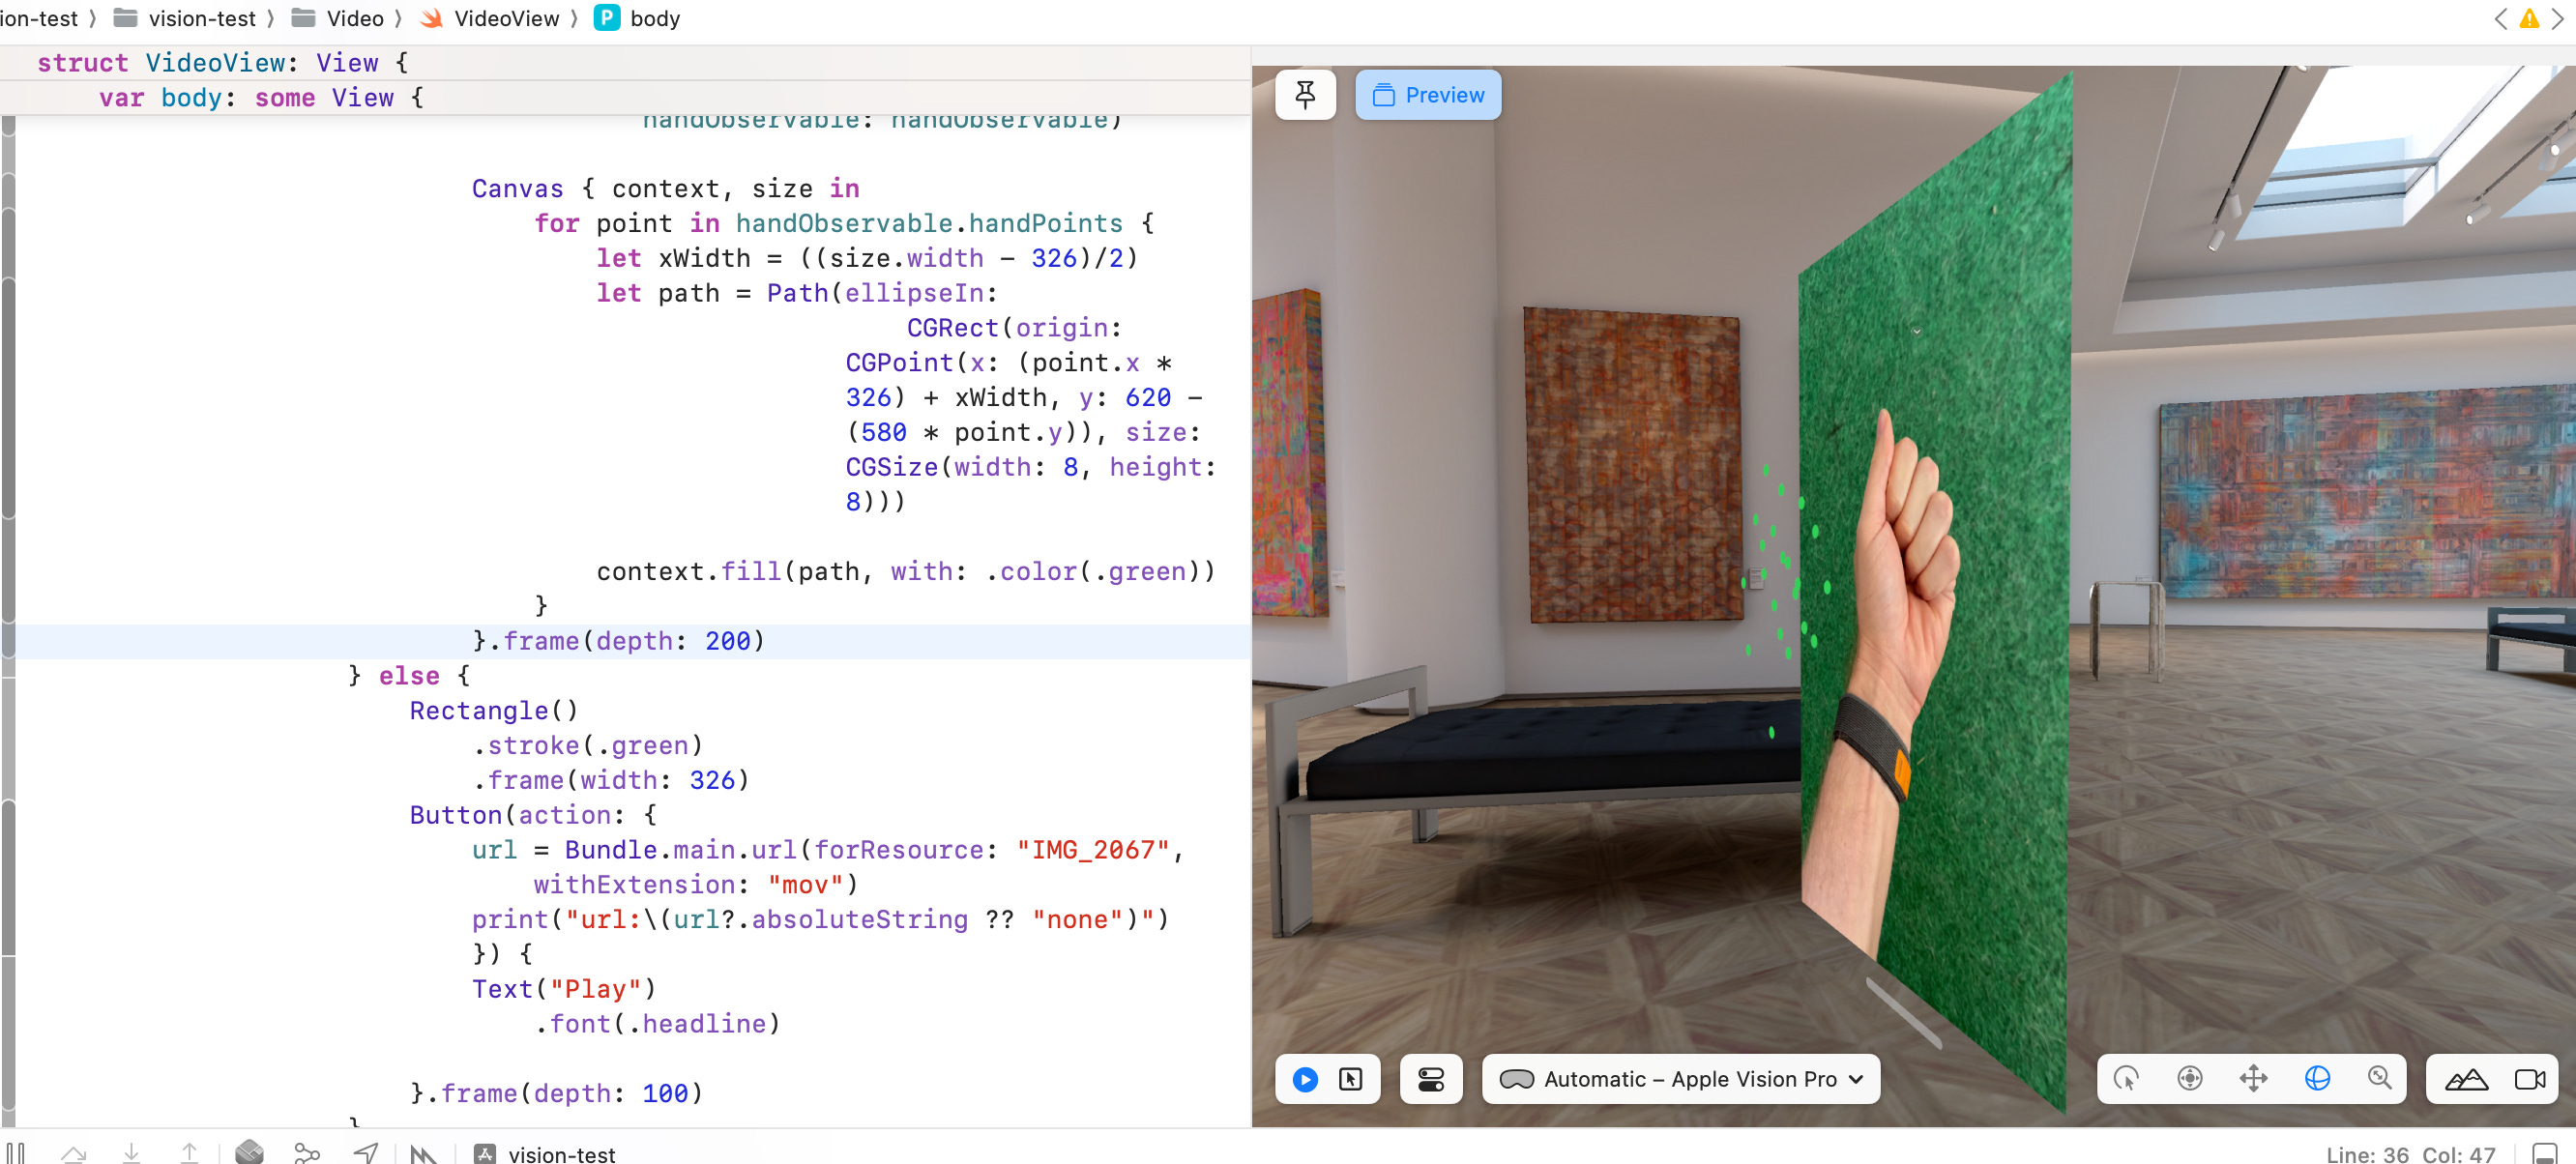
Canvas { context, size in
                                for point in handObservable.handPoints {
                                    let xWidth = ((size.width - 326)/2)
                                    let path = Path(ellipseIn:
                                                        CGRect(origin: CGPoint(x: (point.x * 326) + xWidth, y: 620 - (580 * point.y)), size: CGSize(width: 8, height: 8)))

                                    context.fill(path, with: .color(.green))
                                }
                            }
And that’s it, a pretty convincing effect once you carefully move the viewing position of the window to make sure it’s in the bottom left of the screen.
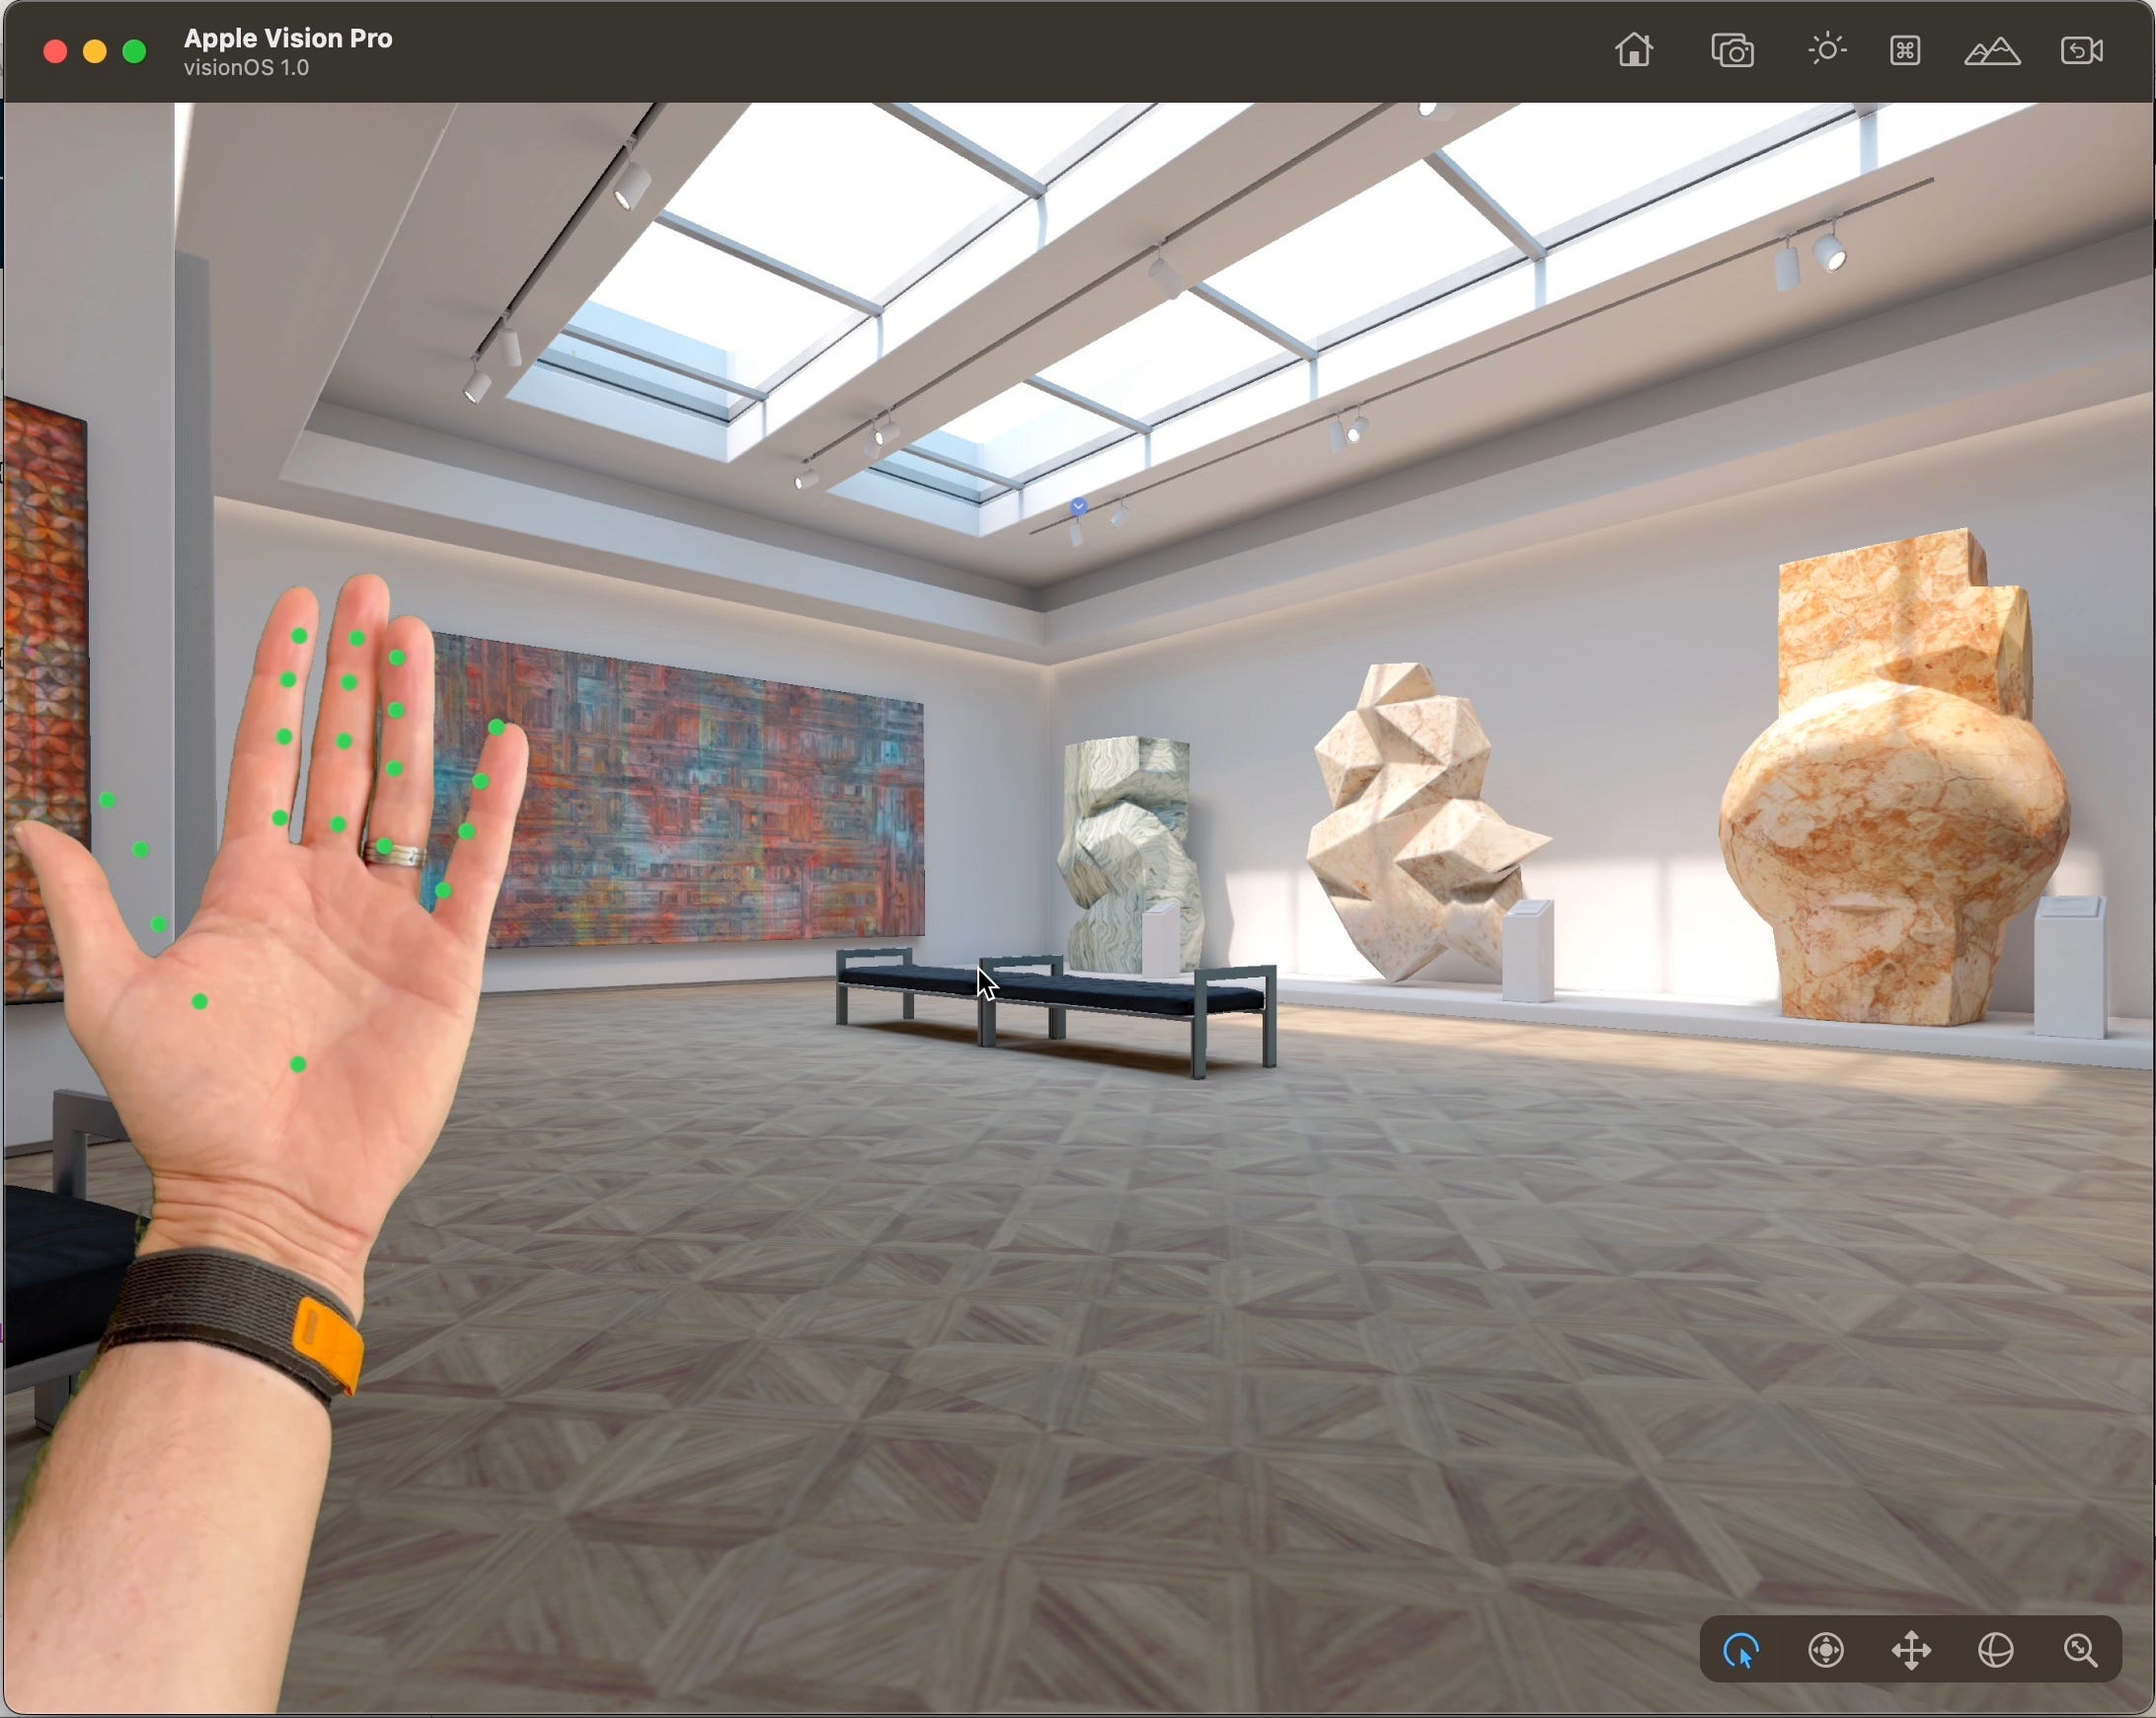
The Vision performance isn’t great (but is also completely unoptimised, running on a 4k video feed) so there’s a bit of a lag but for a POC it works surprisingly well.
So what?
Okay, so what use is this anyway? Well, it should be possible to convert these 2D points into a estimated 3D skeleton that can act like the actual hands detected natively in Vision. If I can get that to work, then it will enable a workflow of pre-recording some hand videos, and using them for testing actual 3D hand tracked gestures and experiences in the Simulator. That same workflow will also be useful for testing experiences using VisionOS detected hands, which already come with 3D data. The ability to “record” hand positions and re-play them back over and over will make testing Vision Pro apps and games easier in the long run.