Sensei Notes #07 - An incredible game, layers, and learning by remixing
Hey!
This week: a lovely multiplayer game 🐧🧊, a Three.js feature that might save you from doing ugly things, and a student who gets how learning actually works.
🎮 This entire multiplayer 3D game runs in a browser tab

Pudgy Penguins just dropped a full 3D game. Not a tech demo, not a quick prototype. A real, polished game. And it runs in your browser. No download, no install, just... a browser tab. See for yourself
Stuff like this is why learning Three.js and R3F matters. The gap between what you can build in a browser and what used to require a native app keeps getting smaller. WebGPU is pushing things even further. If you've been wondering whether 3D web dev is worth your time, well, look at that game and tell me it's not.
🧅 A trick to selectively hide objects from a camera
Say you want a camera to ignore certain objects in the scene without actually removing them. Three.js has a built-in system for this called Layers. Every Object3D and Camera has a .layers property, which is basically a bitmask with 32 slots. If a camera and an object don't share any active layer, the camera won't render it. Simple as that.
We use this on Pascal (our 3D building tool) for thumbnails. The grid, builder tools, and UI helpers all live on their own layer. When we capture a thumbnail, we just tell the camera to skip that layer: camera.layers.disable(1). One line, clean result, no side effects.
It also works well for selective post-processing (like applying bloom to specific objects only), or for separating a HUD from the 3D world in multi-camera setups. Here's how it looks:
// Assign object to layer 1
mesh.layers.set(1);
// Or enable multiple layers
mesh.layers.enable(0);
mesh.layers.enable(1);

// Camera renders only layer 0 by default
// Enable layer 1 too:
camera.layers.enable(1);
// Or disable it:
camera.layers.disable(1);
Check out the official example: webgpu_layers
🙌 The best way to learn from a tutorial
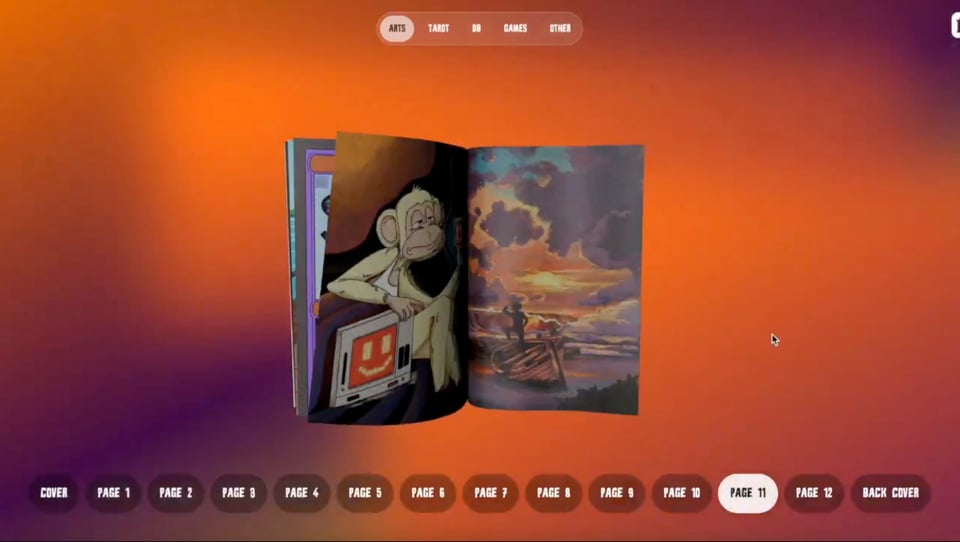
Shoutout to @nickvrnn who's been super active, following both the R3F Ultimate Guide course and the free tutorials on my YouTube channel.
He rebuilt the 3D book slider from my tutorial. But he didn't stop there. He customized it, put his own spin on it, made it his. And that's honestly the move. Finishing a tutorial is step one. Making it yours is where you actually learn.
If you're going through a tutorial right now, try this when you're done: change something. Swap the colors, add an interaction, break it and fix it. Then combine multiple things you learned from other tutorials. That's how you go from "I followed a tutorial" to "I built something."
That's it for this week. Come hang out on Discord if you want to chat about any of this.
Happy coding 🧑💻 Wawa