Linktree EXPOSED!
experiences, insights, and findings from the maker and embedded electronics community
how to make your own link-in-bio site for a fraction of the cost!
Link-in-bio sites are everywhere – no longer just for skirting Instagram’s hostility to basic web functionality, but in email signatures, QR codes, business cards, and more. With new social media platforms emerging constantly as replacements for the legacy enshittified social media giants, it can be hard to keep track of where folks are sharing their latest thoughts, accomplishments, and food pictures. But the dominant name in the link game, Linktree, charges $9/month just to use your own branding – which surely is one of the most important features in a page that’s supposed to be all about you or your business? Even at the zero-customization “free” tier, it should be obvious that you are the product, and they could at any point, for example, start displaying ads on your page. But what’s the alternative? As part of ishotjr EXPOSED!, I’m sharing the things I discover along the way too, so when I wanted a page to amalgamate the various newsletter/blogging platforms I’m currently evaluating, I thought I’d take a moment to show you how I created a link-in-bio site that is free forever after an initial $14 investment.
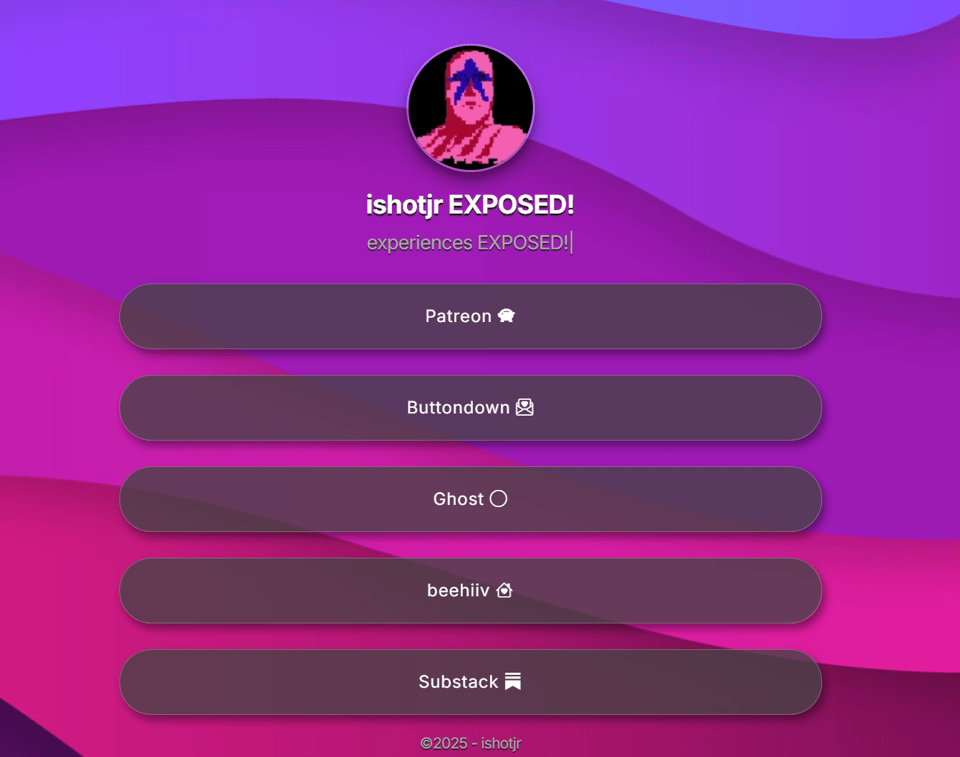
Here’s how I created a quick-and-dirty list of links for ishotjr EXPOSED:
Buy a theme
I’m an experienced web developer, but I just wanted a simple solution, not an extensive project, so I searched for an existing template I could purchase, rather than creating something from scratch. I found this “Treelink” theme, which is lightweight, easy to edit, and based on Bootstrap 5, a front-end framework that I know and trust. I would have loved to see more recent updates to the theme, but this is a simple, largely static site which doesn’t really need to be on the absolute cutting edge. It also has great documentation, so I could quickly understand and begin customizing the provided HTML.
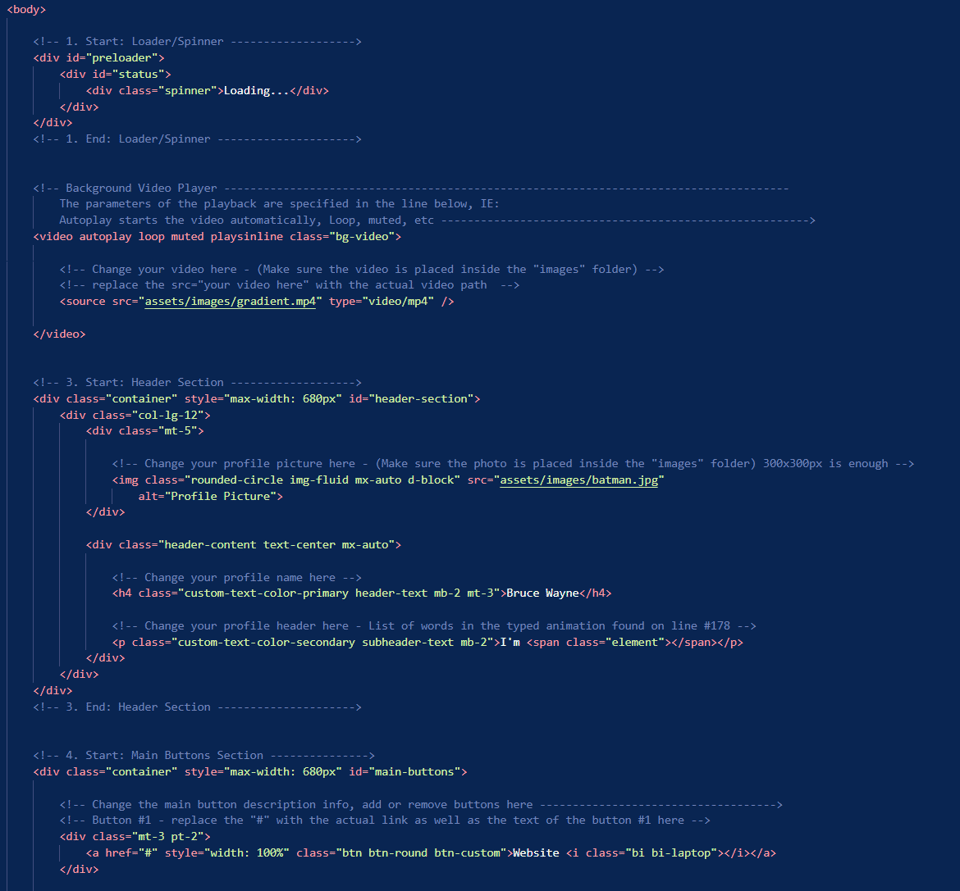
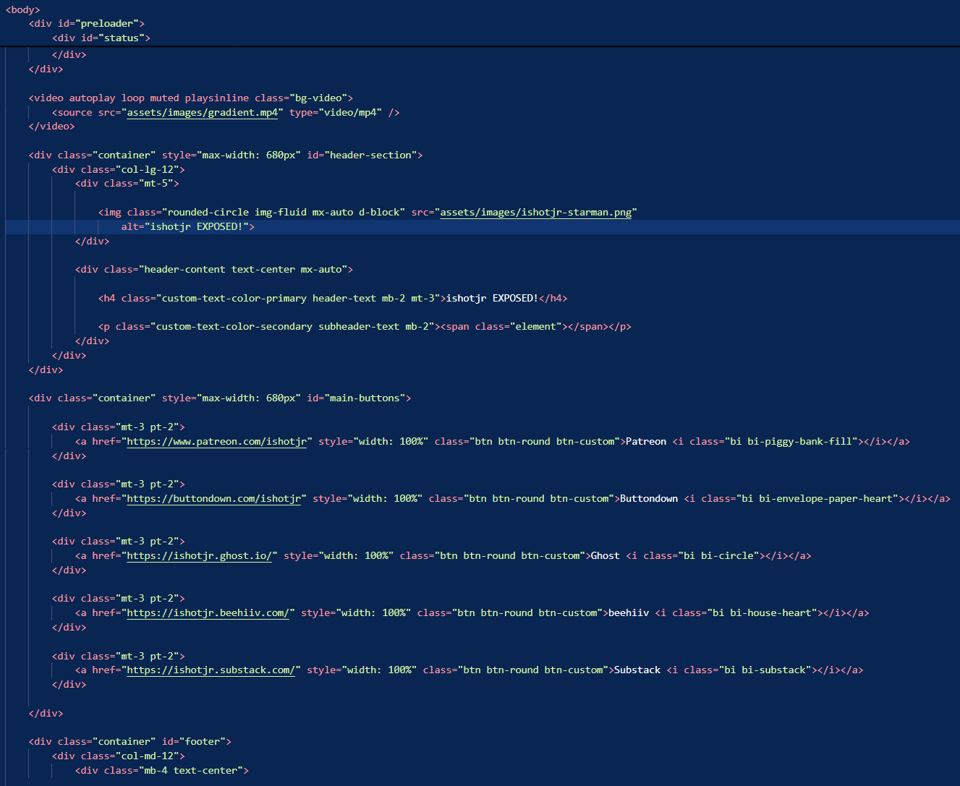
The inline comments were also extremely helpful as I went through replacing the placeholder image, copy, and links with my own, as well as customizing the link icons from the over 2,000 provided by Bootstrap. After testing my changes locally, I was ready to get it online for the world to see.
Free Hosting from GitHub
I have my own servers and cloud accounts that I use to host various applications and projects, but wanted to keep costs down and simplify as much as possible for this tutorial, so I chose GitHub Pages for hosting my link-in-bio site. This tutorial assumes that you have already created a GitHub account, and know how to create a new, empty repository. You should name your repository with the URL that you plan to use for the site, so for example, I called mine exposed.ishotjr.com. Next, clone the empty repo locally via SSH; for example, for my account and repo name:
cd ~
git clone git@github.com:ishotjr/exposed.ishotjr.com
Next, copy the contents of the customized theme into the resultant folder (in my case ~/ exposed.ishotjr.com) and push them back up to GitHub:
git add index.html
git add assets/
git commit -m ":link: :bust_in_silhouette: Add link-in-bio-type thing" && git push
Now your content is “on” GitHub, but there are a few more steps before it’s visible to other people as a web page.
Configure GitHub Pages
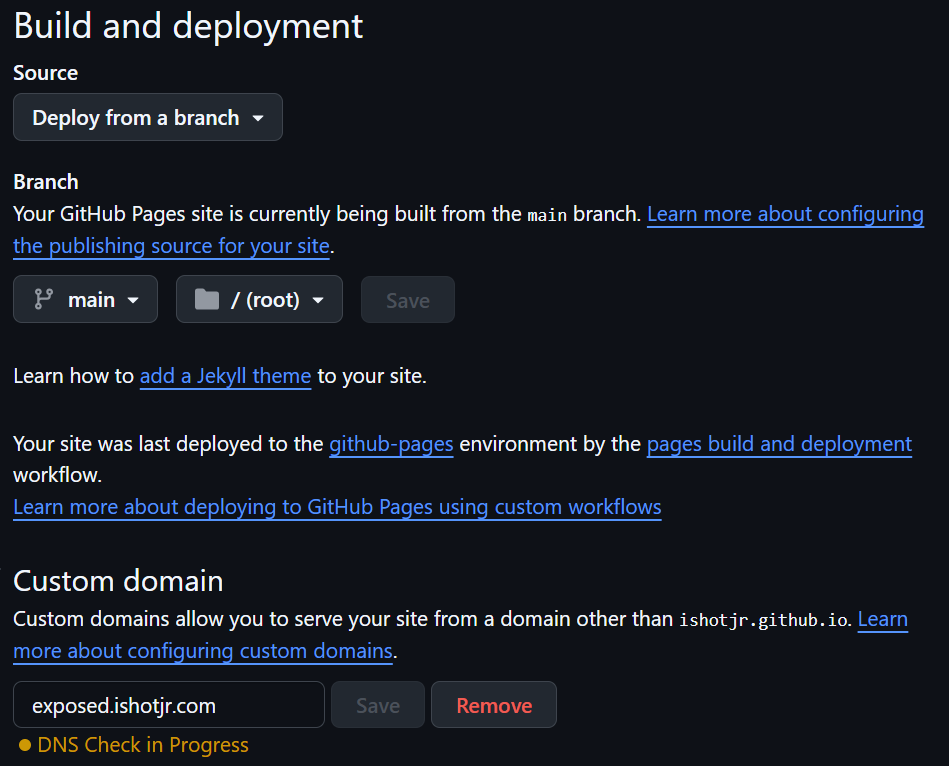
Most GitHub repos are just used for sharing code, so you have to configure the repo to act as a web page by configuring Pages under the Settings area of your repo. Select main as your Branch under Build and deployment, and then hit Save. This will kick off a build process, and after a short while, your website is ready for viewing. GitHub hosts project sites at {username}.github.io/{repo name}, so for example the web site for a repo named blarg.blarggg would be found at https://ishotjr.github.io/blarg.blarggg/ for my username ishotjr. If everything worked, you should now see the same rad link-in-bio site that you customized locally! If not, feel free to reach out and I’ll do what I can to help you – I know I skipped a lot of details, favouring links to external resources, in order to try to keep this brief.
Add a Custom URL
As I mentioned earlier, a big part of Linktree-type sites is branding, so wouldn’t it be better to have a URL like mysupercoolnewsletterwhicheveryoneshouldsubscribeto.com? GitHub Pages supports custom domains, so I set up a subdomain to point to my new site. ishotjr.com already points to one of my blogs, so I chose exposed.ishotjr.com to point to my link-in-bio site.
I already had ishotjr.com registered, but if you don’t have a domain, it’s easy to register one through registrars like Porkbun (please, do not use GoDaddy, Tucows/OpenSRS, or Network Solutions). Then, use your DNS management tool to configure a CNAME to point to {username}.github.io – for example, mine looked like this:
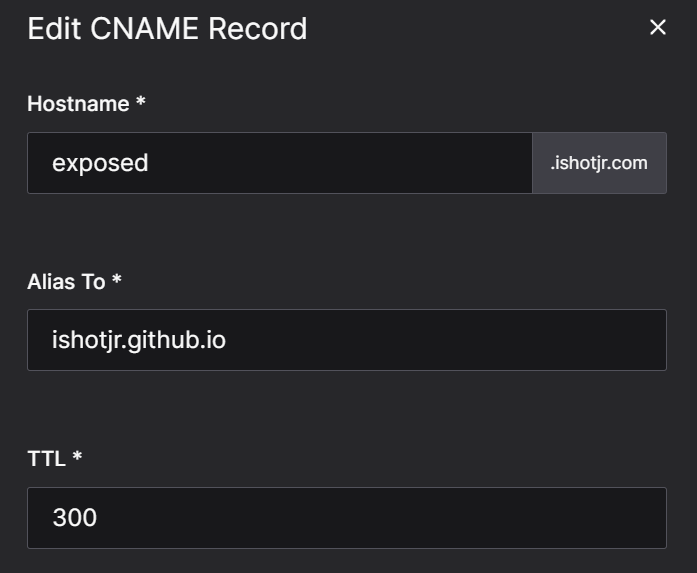
Next, you need to inform GitHub Pages of the custom domain by creating a file named CNAME containing the fully qualified domain name (FQDN) e.g.:
exposed.ishotjr.comand push it to the repo:
git add CNAME

git commit -m ":globe_with_meridians: :satellite: Add CNAME" && git push
You can also use the Custom domain field under Pages to inform GitHub Pages of your custom domain and have it create and commit the CNAME file for you, but I prefer to initiate things locally and push to the repo rather than having to pull any magic commits GitHub happens to add via settings. The DNS settings you made earlier may take some time to resolve, but eventually you will find that your link-in-bio page can be accessed via your custom URL, such as http://exposed.ishotjr.com/ in addition to default GitHub URL (e.g. https://ishotjr.github.io/exposed.ishotjr.com ).
Share Your New Link-in-Bio Site!
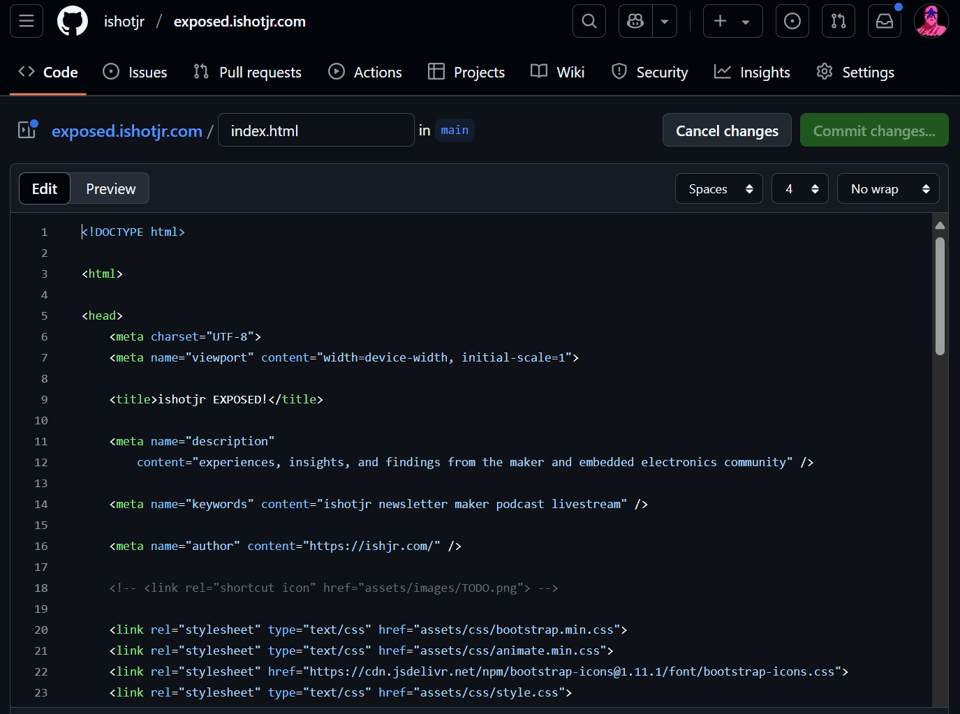
You now have your own, custom, professional-looking link-in-bio page which you have complete control over, with no need to worry about enshittification or monthly fees. You can add or remove links by editing and pushing the local HTML or even just edit the index.html page directly on GitHub:
If there’s interest, I can show you how to make an even more powerful GitHub Pages site using Jekyll, including using a YAML file as a database of sorts for even easier link management. Just let me know via Discord what you’d like to see me cover!
One last note: if you like my newsletter, why not sign up for Alex’s monthly-ish Glow Ahead for rad projects, videos, and tips!
Do you like my writing? I can write your newsletter, reviews, blog posts, documentation, custom projects, and more, like I do for Make:, Hackster, Teensy, Alpenglow, and more. Don't need custom creative content? Show your support by subscribing to this newsletter! <3