New post on Ferritopia: How to Change Your Website's Domain to A New Domain or Subdomain on Hostinger (and vice versa)
How to Change Your Website’s Domain to A New Domain or Subdomain on Hostinger (and vice versa)
Let’s get to the point, you may want to change your website’s domain name for any possible reasons, such as do not want to renew your current domain, changing your website brand, or even just to make it cooler by using subdomain.
It would be simpler if you are using WordPress site, but native php or other kind of CMS should work as well. I also assume you already have your new domain active and added to your hosting account (if not please buy and add it to your hosting), or if it is a subdomain, you have add a new subdomain. Let's go to the fun part.
Table of Contents
Changing your domain on wp-admin (for WP sites)
Let's change your domain in the most basic way first, change your website's domain on your WordPress admin panel. Go to your Settings > General. Skip this step if your website is not WordPress-based.
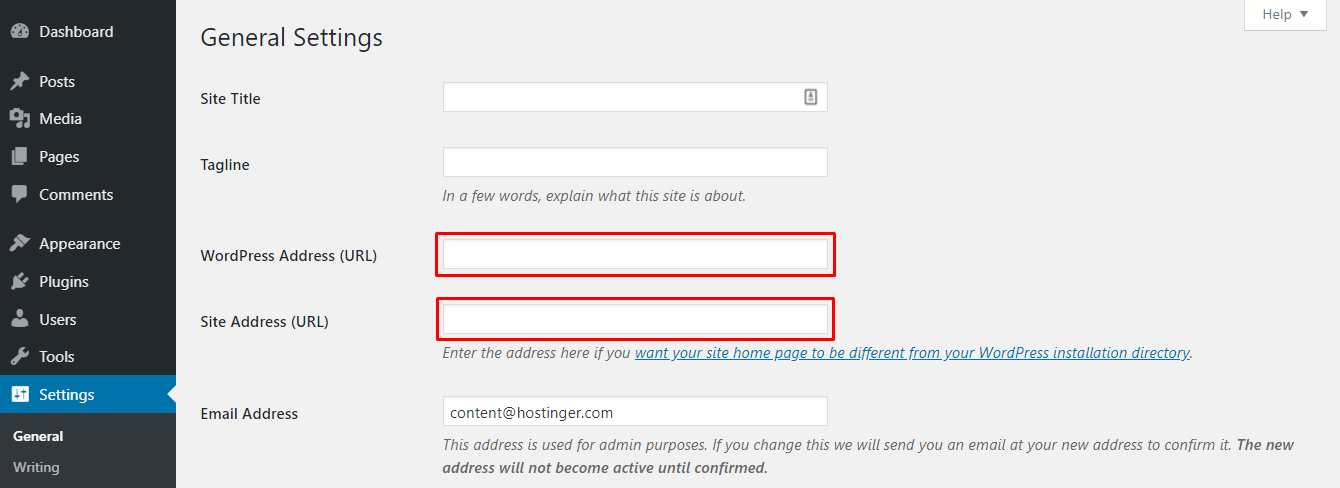
Write your new domain on WordPress address (URL) and Site address (URL), the format should be like
http://yournrewdomain.tldThis will make your website inaccessible, don't worry, it is part of the process.
Move your website files to the new domain directory
The next part is moving your website files. You can move your files using File Manager (beta), make sure you are on your old domain panel, click on File Manager (beta)

Archiving website contents
Right-click on the public_html directory, and click archive. This process will archive your website's files so it would be easier to be moved.

Chose the name and zip as the format.

If you encounter this error, just click close and click anywhere on the screen.

You will see the newly created archive.

Move the archive to new director
Back to your hPanel, and now open File Manager. This time, please make sure you open the File Manager under your main domain (how?). This is important in order to see the entire hosting directory including your domains.

Go to domains folder/directory, choose your old domain, you should see the archive file we just created.
If you are changing your website to a subdomain, you can choose your subdomain directory. Continue if you just want to change your website to a new domain.

Right click on the archive and click move
Choose your new domain as the destination. Click the domains path on the above, select your new domain and click MOVE. Wait until it finished, the archived file should disappear from your old domain now.

Extracting the Website FIles
Still on the File Manager, now browse to your new domain's directory.
You will see the archived file we just moved, right-click and extract the file.

Set the folder name as . (dot) only. Then click EXTRACT.

If you face any issue during the extraction process, please contact he customer support to help you extract the archive file.
Conclusion
Hostinger has its own hPanel that requires a little bit of exploring to do easy things. Changing your website's domain name requires moving your website's files to the new domain's directory. The above steps are one of the ways you can move your website files without the need to re-upload your files from your local computer.
Another alternative would be using FTP account to access your hosting files, and move it from the FTP.