Turn Any Power App Into a Chrome Extension - Here’s How
Hey,
Dennis here.
Quick heads up: I just dropped a new YouTube video:
 🎥 Watch: I Built a PowerApps Chrome Extension (Yes, It Works)
This one was a fun little side project I did last weekend.
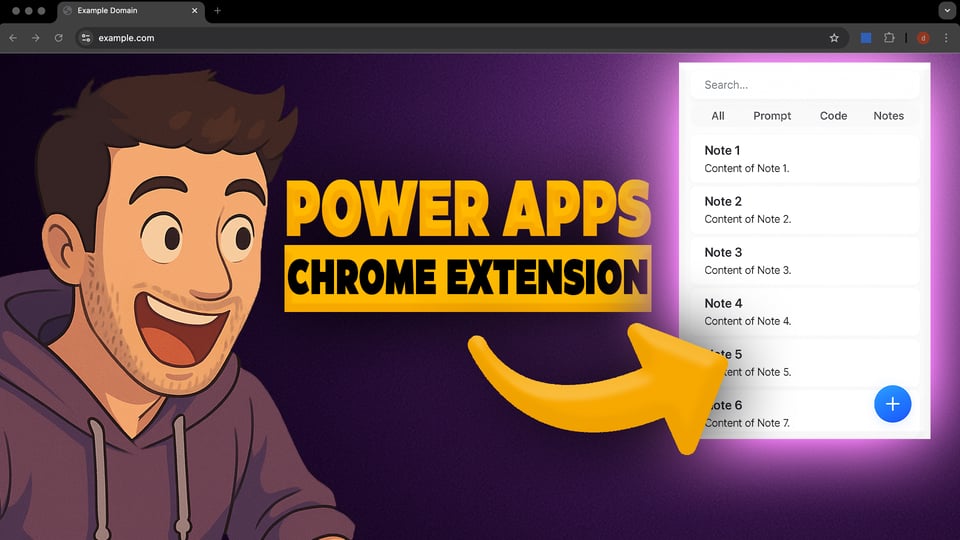
I built a full PowerApps note-taking app... inside a real Chrome extension popup.
And it works perfectly.
But why did I build it?
Because I kept needing a quick way to store and access notes or code snippets.
You know, repetitive stuff like:
Parent.Width / 2 - Self.Width / 2
Or a quick Patch() function that I might forget.
I wanted this one click away. No context switching, just always there.
Sure, there are tools out there that do this.
But come on, we build Power Apps. So why not use our own skills?
Plus, it’s your own app, so you can customize it however you want.
🧠 What’s inside the video
- How to set up the Chrome extension shell
- How to build the note-taking app in Power Apps
- How to connect it to SharePoint
- How to embed the app in the extension popup
- A full working demo at the end
🛠️ How it works (quick breakdown)
There are three main parts:
- Chrome Extension
- PowerApps UI
- PowerApps Backend (SharePoint)
1. Chrome Extension
You’ll need three small files:
manifest.jsonpopup.htmlpopup.css
Here's what each does:
manifest.jsonis basically the brain of the extension. It tells Chrome how to load it and what files to use.popup.htmlis the actual UI container. It holds the<iframe>where we embed the Power App.popup.cssjust adds some basic styling and sizes everything correctly for the popup window.
As a subscriber, you get direct access to all of this. No need to create the files yourself.
👉 Download the Chrome Extension ZIP
After downloading:
- Open Chrome
- Go to
chrome://extensions/ - Turn on Developer Mode (top right)
- Click “Load unpacked”
- Select the folder you just downloaded
Now your extension should appear in the toolbar. But it’s still empty, because we haven’t built the app yet.
2. Build the Power App
This part is up to you.
You can:
- Follow my workflow from the video
- If you’re a Pro user of my library, copy the full app YAML code from the component library
- Or build your own app from scratch
Totally your call.
3. Backend with SharePoint
If your app needs to store data, you’ll need a backend.
In my case, I built a note-taking app, so I used a SharePoint list with three columns:
Title- to find notes easilyContent- the actual snippetType- for example: Code, Prompt, Note
I connected the Power App to this SharePoint list,
used a gallery to display saved notes,
and added a small modal screen with a Save button that uses a Patch() function to add new items.
Simple setup, but it works.
Final Step: Publish and Embed the App
When you're done building your app:
- Publish it in Power Apps
- Copy the public app URL
- Open
popup.htmland find this line:
<iframe src="POWER-APP-URL"></iframe>
Replace the placeholder with your actual Power App URL.
Save the file, refresh your extension in Chrome - and boom!
✅ You now have your own fully working PowerApps Chrome Extension
📦 Grab the Extension Files Again or Visit the YAML Component Library:
👉 Download Chrome Extension Files
Would love to see what you build with it!
Just hit reply and send a screenshot if you try it out.
Talk soon,
Dennis