This week: Seed Starting, a Holiday Tradition
Hello!
Want to start a holiday gardening tradition? Try winter seed starting to celebrate the new year! Many native perennials require a period of cold before they can sprout. This is called cold stratification, and it makes them perfect candidates for winter sowing outside.
What Seeds Can Be Winter Sown?
If you read the back of a seed packet and see phrasing like “sow in the fall” or “sow before the last frost,” you should cold stratify. I rely on the germination codes on Prairie Moon Nursery’s website to tell me whether this step is needed — I search the native I’m interested in and see what it says. You can winter sow anytime throughout late December, January, and February.
Some native seeds, like Purple Coneflower, don’t need any pre-treatment and can be planted in the spring. These can also be sown in the winter. Logically, these seeds would’ve been outside all year anyway.
If you’re wondering which seeds to plant, head to this post for my tried-and-true native perennials to grow from seed, and add Great Blue Lobelia (Lobelia siphilitica) and Purple Lovegrass (Eragrostis spectabilis) to the list. I tested them this past summer, and they grew easily.
How to Start Seeds Outside
Every time I sow seeds outside, I start them in labeled pots until they are mature enough to transplant into the garden. This way, I know which seeds thrived and which didn’t, and I also have control over my garden’s design.
Other than your winter coat and a warm hat, here’s what you need to get started.
Supplies:
Seeds
Plastic or fabric pots (ceramic pots can crack)
Potting soil
Horticultural sand (found with the houseplant soil at many stores)
Hardware cloth or an old screen to protect the seeds from birds
Weatherproof labels
Steps:
Fill the pots with potting soil.
Thoroughly water the pots and let them drain.
Mix the seed packet with a few tablespoons of sand in a bowl or bag.
Cover the dampened soil with a thin layer of sand-seed mix.
Gently press the mix onto the soil.
Label each pot with the flower’s name.
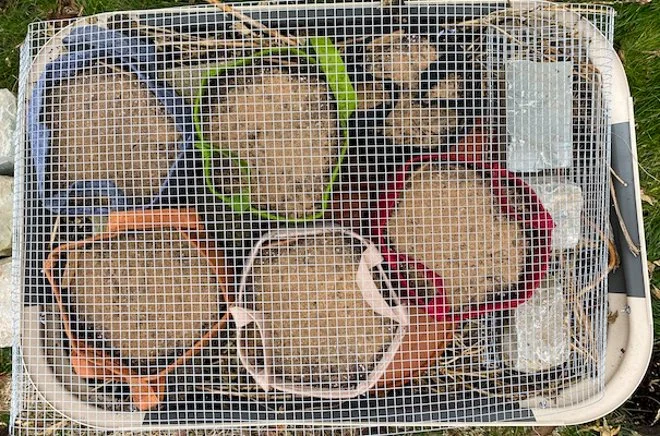
Place the pots where they’ll be exposed to the elements.
Cover the pots with hardware cloth or a screen and weigh it down to keep it in place.
In the late spring and summer, water the pots when natural rainfall is insufficient. In the fall or the following spring, transplant the young plants into their forever home.
What if my seeds didn’t grow or died?
If the summer and fall pass and nothing sprouts (or if what sprouted dies), leave it alone until next year. Something may still grow next year!
Elsewhere:
Use less chemical deicers this winter, and your waterways and gardens will thank you! Penn State Extension explains the different types of deicing products and how to use them. Spoiler alert: one grain of deicer every three inches should do the trick!
Have a great week,
Julie