More Formatting Fun with pwshSpectreConsole
In this issue:
Last time I shared some ways you could use commands from the pwshSpectreConsole PowerShell module to add rich formatting to your command output. There's so much to sample and consider. In the previous article I focused on tables, grids, and panels. Today, I want to cover some special formatting options that you might find useful in your PowerShell code. As I hope you will discover, once you spend some time with the commands, you will find new ways to enhance your output.
Write-SpectreHost
Like Write-Host, Write-SpectreHost sends output directly to the console. However, it adds a lot of formatting options that you won't find in Write-Host. With Write-SpectreHost, you can easily change the color, style, and other aspects of the text being displayed. You can use a simplified Markdown syntax.
Write-SpectreHost "I [italic green3]am[/] the [pink1 underline]walrus[/]"
Don't forget to "close" your styles with [/] to return to the default formatting. The color values can be any of the named colors supported by Spectre.Console that you see by running Get-SpectreDemoColor.

Host vs Pipeline
One difference between Write-SpectreHost and Write-Host is that Write-SpectreHost can also return the formatted text as an object instead of bypassing the pipeline and writing directly to the console. You can do this by using the -PassThru parameter.
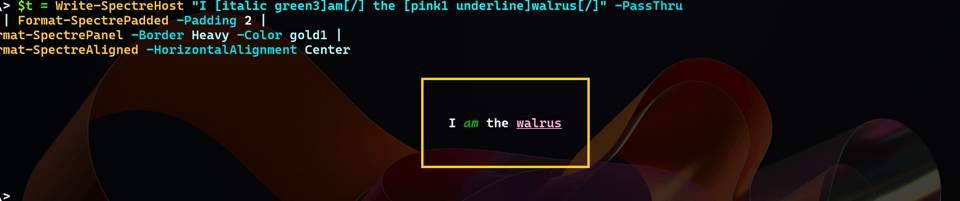
$t = Write-SpectreHost "I [italic green3]am[/] the [pink1 underline]walrus[/]" -PassThru
$t | Format-SpectrePadded -Padding 2 |
Format-SpectrePanel -Border Heavy -Color gold1 |
Format-SpectreAligned -HorizontalAlignment Center
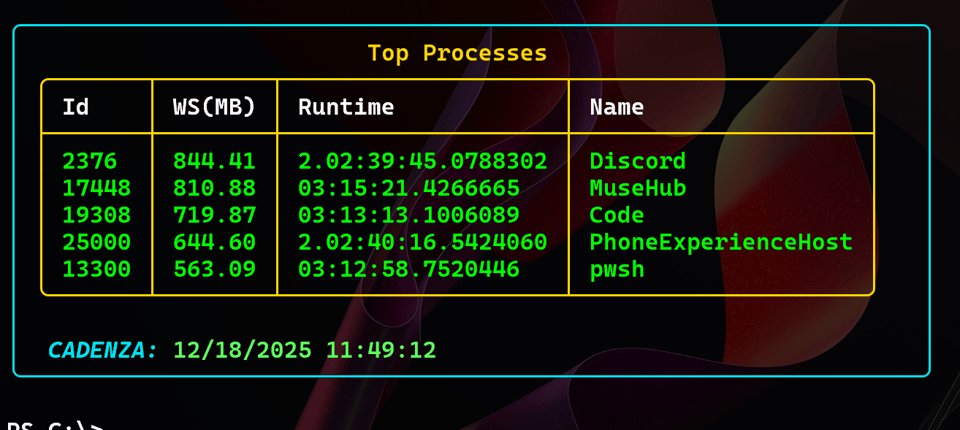
Here's a more practical example using the command to display a caption.
$p = Get-Process | Sort-Object WorkingSet -Descending |
Select-Object -first 5 -Property ID,@{Name="WS(MB)";Expression={$_.WorkingSet/1mb}},
@{Name="Runtime";Expression = {New-TimeSpan -Start $_.StartTime -end (Get-Date)}},Name |
Format-SpectreTable -TextColor green1 -Title "Top Processes" -Color gold1
$caption = Write-SpectreHost "[bold italic Aqua]$($env:computername):[/] [SeaGreen2]$(Get-Date)[/]" -PassThru
$data = @()
$data+= New-SpectreGridRow -Data $p
$data+= $caption | Format-SpectrePadded -Left 1 -top 1 -Right 0 -Bottom 0
$data | Format-SpectreGrid | Format-SpectrePanel -Color aqua
Adding Links
I also like that you can insert clickable links into the text you display with Write-SpectreHost. You can do this by using the syntax [link=url].
Write-SpectreHost "You can visit [link=https://jdhitsolutions.github.io green1]here[/] to find all of my online links."
I'll let you try this on your own so you can see how it works. This will only work in a console that supports the feature, such as Windows Terminal.
> I'll re-visit this feature later.
Emojis
This next feature is probably more fun than practical. You can easily add emojis to your output. Adding emojis might add information or merely a little flair to your output.
The emojis are defined in a .NET class, [[Spectre.Console.Emoji+Known]. To discover the available emojis, run Get-SpectreDemoEmoji. The output will show you all emojis and their Markdown codes. Unfortunately, there isn't a module command to make it easier to find and use these emojis.
Get-SpectreEmoji
Lucky for you, I wrote one!
#requires -version 7.5
#requires -Module pwshSpectreConsole

function Get-SpectreEmoji {
    [cmdletbinding(DefaultParameterSetName = "Name")]
    [OutputType('SpectreEmojiInfo')]
    param(
        [Parameter(Position = 0,ParameterSetName = "Name")]
        [ValidateNotNullOrEmpty()]
        [SupportsWildcards()]
        [string]$Name = '*',
        [Parameter(ParameterSetName = "Pattern",HelpMessage = "Specify a case-sensitive regex pattern for the emoji name")]
        [ValidateNotNullOrEmpty()]
        [regex]$Pattern
    )

    if ($Pattern) {
        Write-Verbose "Using pattern $($Pattern.ToString())"
        $filter = {$_.Name -match $Pattern}
    }
    else {
        Write-Verbose "Using wildcard $Name"
        $filter = { $_.Name -like $name }
    }
    Write-Information $Filter
    [Spectre.Console.Emoji+Known].GetFields().Where($filter).foreach({
            $parsedName = ($_.Name -cReplace '([A-Z])', '_$1' -replace '^_', '').ToLower()
            [PSCustomObject]@{
                PSTypeName = 'SpectreEmojiInfo'
                Name       = $_.name
                Markup     = ":$($parsedName):"
                Emoji      = [Spectre.Console.Emoji+Known]::$($_.Name)
            }
        })
}
The default behavior is to show all emojis, or you can search by name using wildcards.
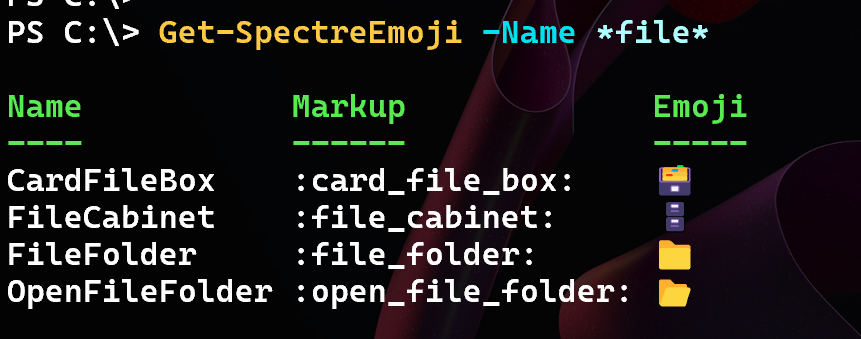
The function also supports using a regular expression pattern.
Use the Markdown code to insert the emoji.
Write-SpectreHost ":open_file_folder: Opening [italic gold1]C:\Temp[/]"

Ruler Line
A ruler line is a simple way to separate sections of output. You can use the Write-SpectreRule command to create a ruler line. You can customize the color and even add a title which you can align.
Write-SpectreRule -Color orange1 -Title "Demo Time" -LineColor lime

By default the command writes a string object to the pipeline. However, you can use the -PassThru parameter to return the ruler as an object that you can further format.
#requires -version 7.5
#requires -modules pwshSpectreConsole

Param([string]$Path = 'C:\Temp')

#convert to a file system path
$Path = Convert-Path $Path

#get the file data
$data = Get-ChildItem $Path -file -Recurse -OutVariable f |
Where-Object Extension |
Group-Object Extension -NoElement | Where-Object count -gt 1 |
Sort-Object Count -Descending |
Select-Object -first 10

#Create the SpectreConsole output
$rule = @{
    Color     = "orange1"
    Title     = "File Analysis :file_folder:"
    LineColor = "Lime"
    Passthru  = $True
}
Write-SpectreRule @rule

#writing the title separately because it might be too long for the table
#insert a clickable link to open the folder in Windows Explorer
Write-SpectreHost "[lime italic link=file:///$Path]$Path[/]" -PassThru |
Format-SpectrePadded -Left 1 -top 1 -Bottom 0 -Right 0 | Out-SpectreHost

$data | Format-SpectreTable -Color gold1 | Format-SpectrePadded -Padding 1

$rule.Title = "Processed $($f.count) files"
$rule["Alignment"] = "Center"
Write-SpectreRule @rule
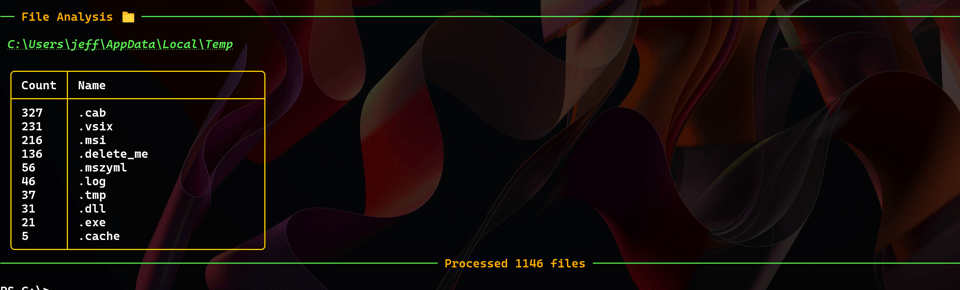
This script will also create a clickable link to open the folder in Windows Explorer.