Getting Started with pwshSpectreConsole
To wrap up the week, I thought I'd leave you with something fun. Although, you might be tempted to while away a few hours this weekend playing with it. I want to give you a quick introduction to and a taste of the pwshSpectreConsole module. This module is a PowerShell wrapper around the Spectre.Console library. The Spectre.Console library is a .NET library that allows you to create rich console applications. The pwshSpectreConsole module makes it easy to use the Spectre.Console library in PowerShell scripts. You should think of the pwsSpectreConsole module as a toolkit or framework. You would use the module commands to add rich console features like tables, progress bars, and images to your scripts and functions. I'm just beginning to explore the module and how I might incorporate it into my work. Let me show some of the features I'm excited about.
Installation
First, you need to install the pwshSpectreConsole module. You can install the module from the PowerShell Gallery using the following command:
Install-PSResource pwshSpectreConsole
The module requires PowerShell 7, and should work cross-platform. You can find full documentation at https://pwshspectreconsole.com/.
When you import the module, you might see a warning about configure output encoding. Many of the commands will work. I put this line in my PowerShell profile script.
$OutputEncoding = [console]::InputEncoding = [console]::OutputEncoding = [System.Text.UTF8Encoding]::new()
Also, make sure you are running the latest version of Windows Terminal. Otherwise, some module commands may not work as expected.
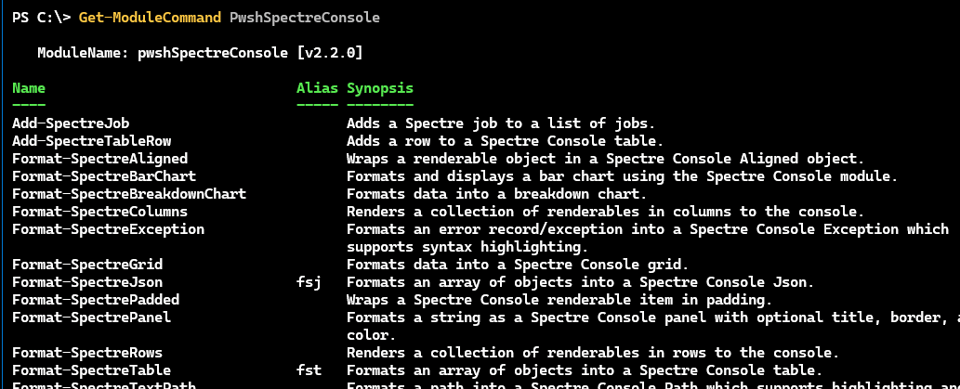
I'm not going to cover every command. You can use Get-Command to discover module commands. Or use Get-ModuleCommand from the PSScriptTools module.
I strong encourage you to run the module's demo script.
Start-SpectreDemo
The demo will give you a taste of what you can do with the module. You can always look at the command's source code in the GitHub repository.
I'm going to highlight a few of my favorite features.
Fun with Read-Host
This may seem like a simple, thing, but I love the ability to add a prompt to Read-Host that lets me specify a default value. You can also set a timeout value, provide choices and and even style the prompt.

I like that the command will validate the choice and re-prompt if necessary.
You can also provide multiple choices.
Read-SpectreMultiSelection -Message "Select the computers to query:" -Choices "Server1","Server2","Server3","Server4" -ChoiceLabelProperty -color Aquamarine1

If you only want the user to select one item, use Read-SpectreSelection.
Read-SpectreSelection -Message "Select the computers to query" -Choices "Server1","Server2","Server3","Server4" -color Aquamarine1
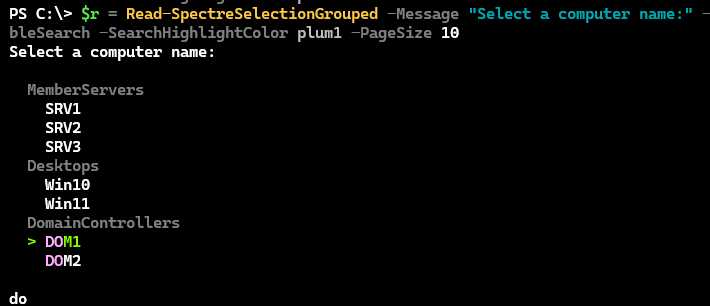
Or how about offering grouped choices?
$choices = @{
    "DomainControllers" = @("DOM1","DOM2")
    "MemberServers" = @("SRV1","SRV2","SRV3")
    "Desktops" = @("Win10","Win11")
}
$r = Read-SpectreSelectionGrouped -Message "Select a computer name:" -Choices $choices -Color "Chartreuse1" -EnableSearch -SearchHighlightColor Plum1 -PageSize 10