Behind the Scenes - Part 1
In Wednesdays, a “scene” is a narrative unit occurring at a specific time and place, between specific characters. Not unlike theatre or movie scenes.
They are the core of the game, and half of its gameplay (the other half being the Park, see our previous newsletter).
In this new series, I will try to explain how these scenes came to be, from first draft to polish.
If you have no idea how game development works, this series is for you, for I will try to be exhaustive without getting technical.
If you do know game development, this series is for you too, for Wednesdays is quite an unusual game and you might be surprised by some of our processes.
Step 1: Drafting
Wednesdays is a narrative game, designed by a writer. So it should come as no surprise that the writing is the part that came first (it’s rarely the case in video games).
While I had a vague idea of what Wednesdays could be, the game only started to find shape once I put the first dialogues down on paper. I’m talking about literal paper: most of my writing (including this newsletter) is born on a notebook, at a cafe. Paper has a huge advantage compared to a text editor: it doesn’t allow you to edit. Even if you aren’t satisfied with your previous writing, your only option is to go on. And that’s how you get work done.
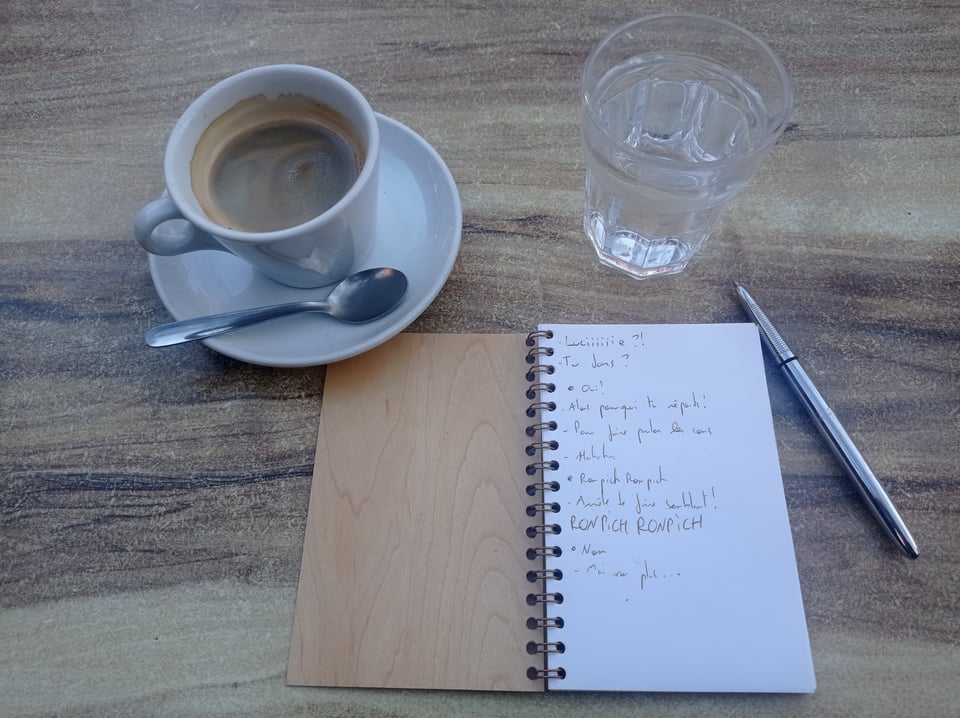
This process works well for me anyway, and all of the scenes from Wednesdays have been drafted that way very early in the project, before anything else, somewhere between March and June 2022. Of course, a lot of things have changed since then, but the characters, the stories, the settings… Everything was already there!
Step 2: “Inking”
But Wednesdays is a video game. Its scenes are interactive, with dialogue options, branching, variables… things paper cannot properly convey. So in order to get a better feel of this interactivity, the next step was staging the scenes on Inky.
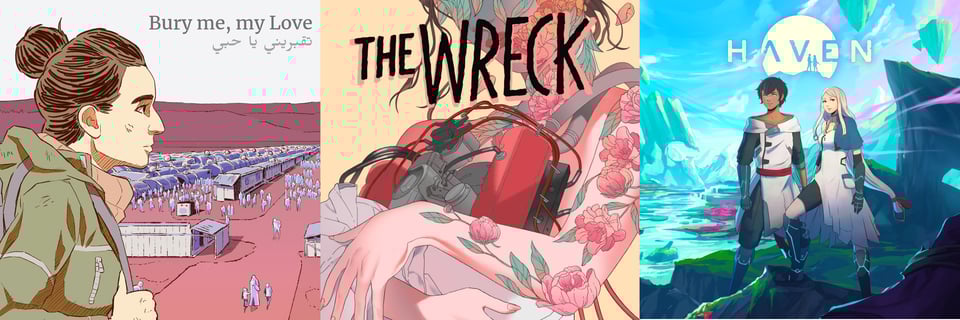
Inky is an open-source script editor created by Inkle Studio. It allows to quickly write and test interactive stories and has been used for many great narrative games such as Bury Me My Love, The Wreck or Haven.
Yes. I know I worked on all these games, that’s called cross-marketing, baby.
More seriously go check Inkle’s amazing games (I especially recommend Heaven’s Vault and Overboard). You can also see a list of ink-based games here.
===Explaining_Ink===
Inky’s language (called “ink”) works a bit like a Choose your own adventure book, but instead of a number, each section (or “knot”) has a name between ===, and instead of telling the player to flip pages to find the next section, you redirect them using ->.
Is that clear enough?
* No -> Explaining_Ink
* Yes -> Moving_On
===Moving_On===
Here is what an actual game script looks like in Inky:
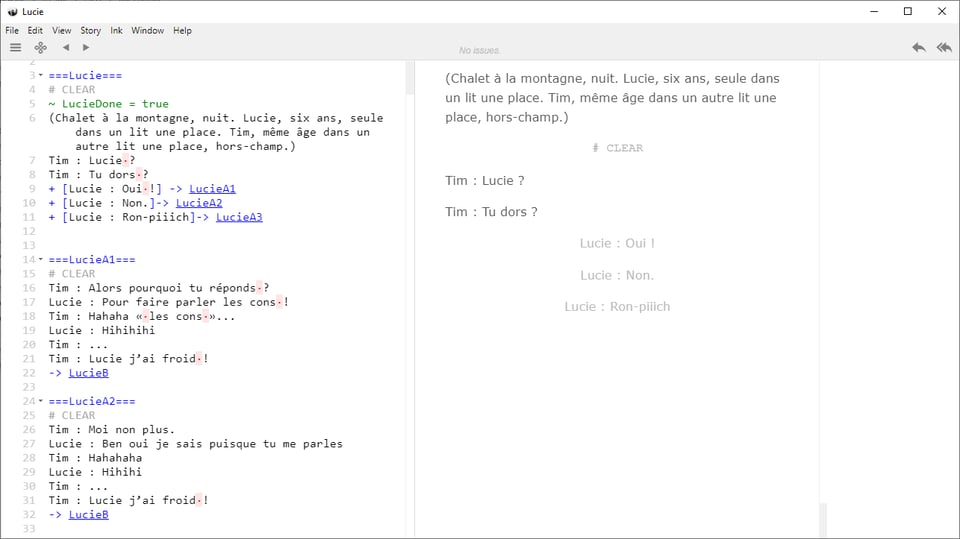
The script is on the left, and the result on the right. As you can see, I can now play the script directly in Inky and check if it works as intended. Does the dialogue flow? Is the rhythm good? Are all the branches as satisfying? I can now try it out and start improving my drafts.
From now on, this ink file will be the backbone of the scene and will be used through the whole developpement. Starting with:
Step 3: Prototyping
Once I’m satisfied with the flow of a scene, it’s time for some prototyping.
First, the ink file is integrated in Unity. Unity is what we call a “game engine”, basically a toolkit allowing you to make games without coding everything from scratch. Here’s what it looks like:
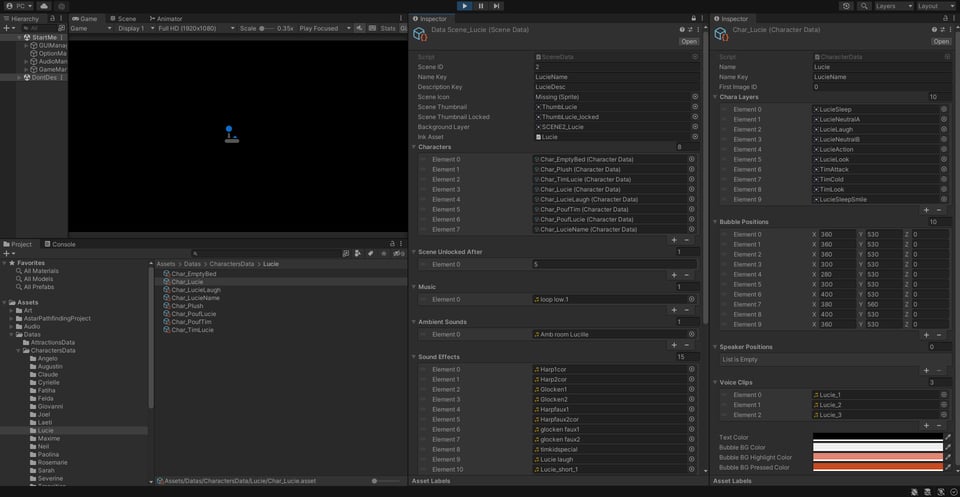
If it looks scary to you, know that it looks scary for me too!
I’m terrible at programming but I wanted to be able to prototype the scenes myself, so the first thing I asked Chris, our main programmer, was to code some tools allowing me to do so using only Unity and Inky.
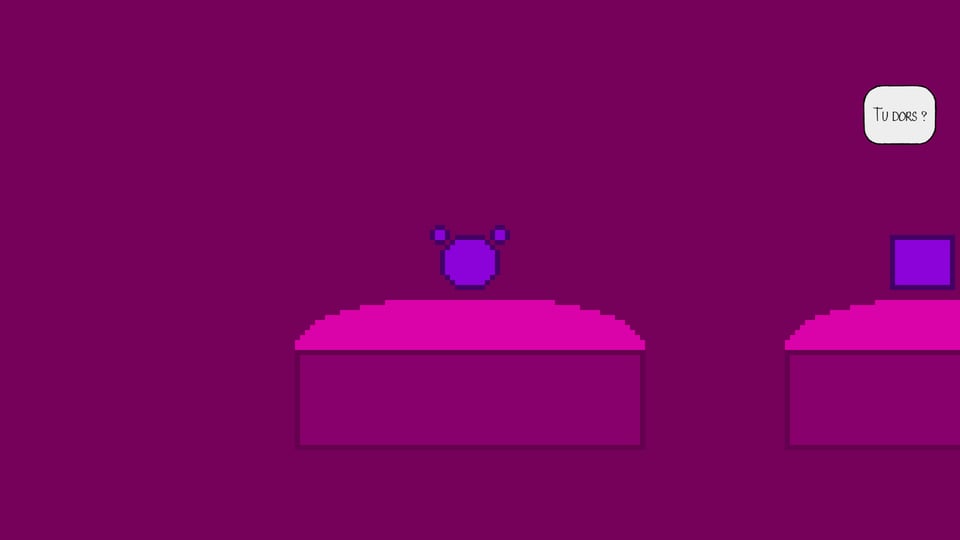
Now, thanks to Chris’ amazing work, all I have to do is fill the fields in Unity with the correct files or values to play the scene with actual graphics.
And by actual graphics I mean ugly placeholders made on MSPaint.
If the scene needs specific unique features, such as the “minigame” in Lucie’s scene, I ask Chris to code them. But for the most part, I’m able to stage the scene on my own using the “tags” he created for me.
For instance:
If I write “#image_Tim_X” in my Inky file and then import the file in Unity, then the prototype will display the image called “Tim_X”
Similarly, “#sound_Y” will play the sound Y, “#pause_1” will pause the game for a second, etc.
At this moment the goal is to make the scene fully playable with placeholder graphics and sounds so that the rest of the team can have a glimpse of what I have in mind… and eventually make it better!
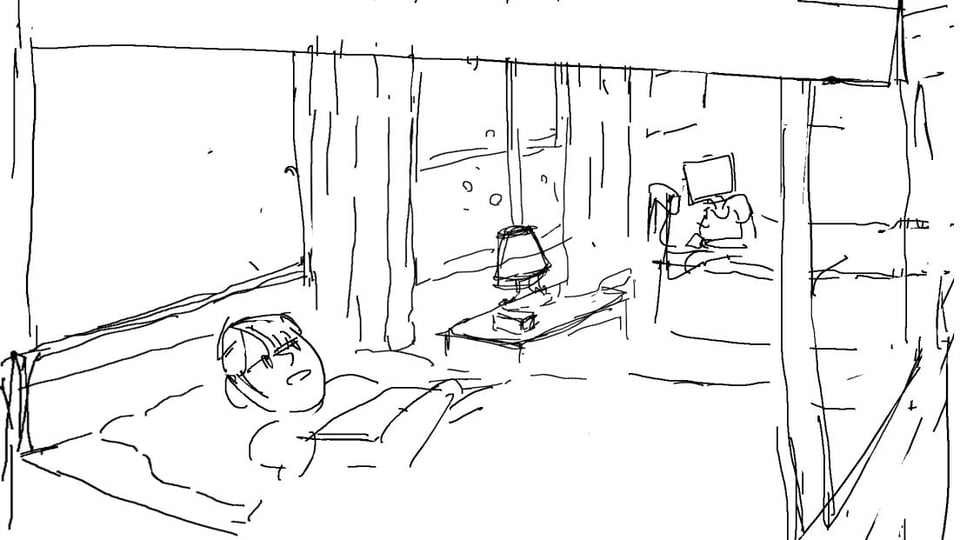
Step 4: Sketching
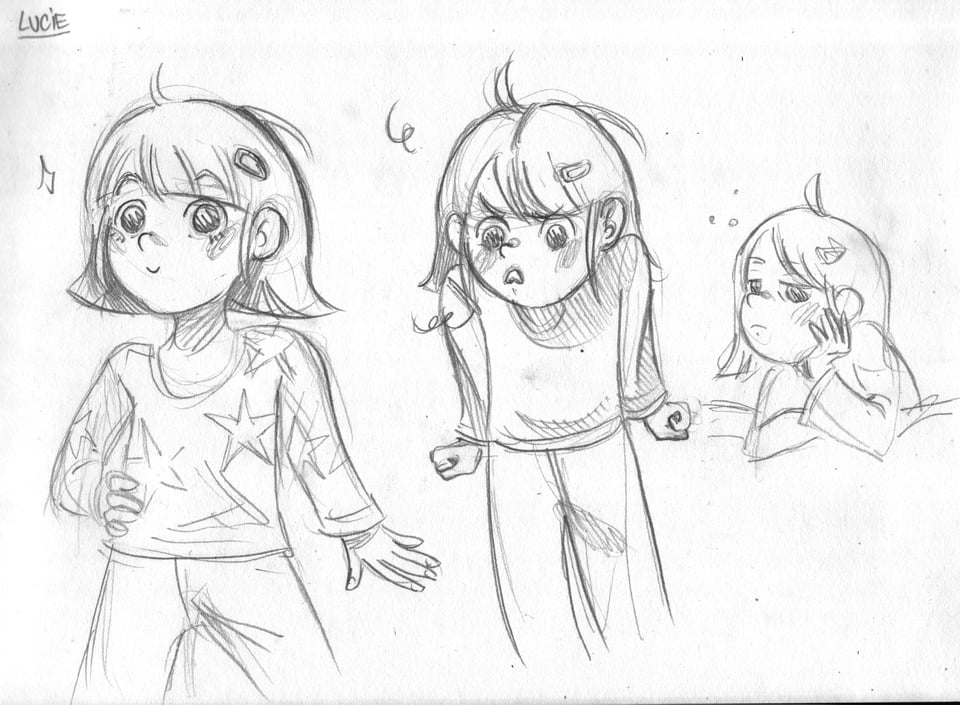
The prototype is now working but everyone's eyes are bleeding. Quick! We need an actual artist! That’s when Exaheva enters the scene.
First, we will need some concept arts for the characters. Concept arts are the references we use to draw these characters in the future. They’re especially useful in large teams, with more than one artist. For Wednesdays, their goal was primarily to make sure Exaheva and I were on the same wavelength.
Usually, I just gave Exaheva a few indications on the character (age, temperament), sometimes a few reference pictures found on the internet, and usually, she just nailed it on her first try.
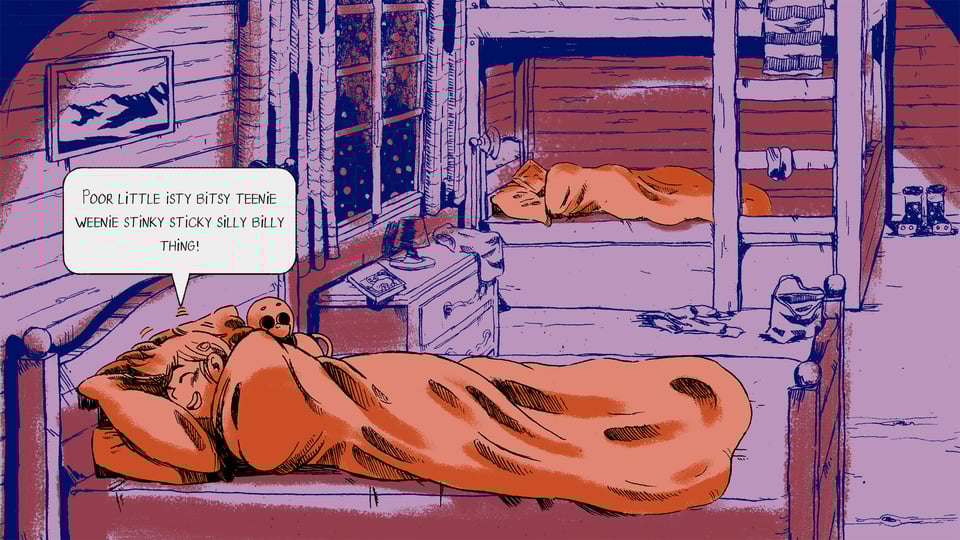
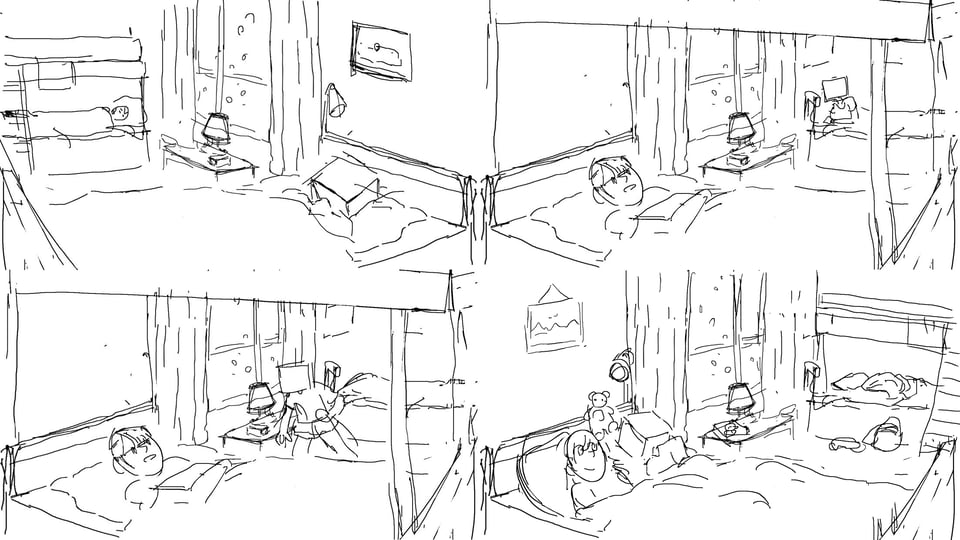
Then, the whole scene needs to be sketched too, to get an idea of the framing, the composition. This time, the amount of work may vary a lot depending on the scenes. Scenes with a single background and not much movement such as Lucie will generally only require a few back and fort, while some other scenes will require a whole storyboard!
Now…
How do we get from this…
…to this?

That will be the topic of Behind the Scenes Part 2, our next newsletter! It will be sent next Wednesdays because I hope you’re impatient!
If you liked this newsletter feel free to share it with all your friends (like, please do!).
Oh! And if you haven’t played the game yet, let me remind you that you can find it on Steam, or itch.io!