Tech Tips / Making an old Windows computer a WiFi extender
Are you fed up of WiFi that’s underdelivering your expectations? What if you could bring out your old laptop for example, hook it up to Ethernet, and allow it to broadcast a WiFi network? Today, I’m going to show you exactly that.
Please note: you need to have a device that is able to find wireless connections and you need to be running Windows 10 or newer. You also need to note that if you restart your computer for any reason, the hotspot doesn’t come back on automatically. Also, Windows will not broadcast multiple frequencies at the same time, you’ll only be able to pick one for it to broadcast (e.g. 2.4GHz, 5GHz or 6GHz).
Let’s get started.
To start, as any tutorial is going to tell you, boot up your computer. If your computer is a bit old and it doesn’t have a solid state drive, go make yourself a cuppa (although this tutorial isn’t long anyways).
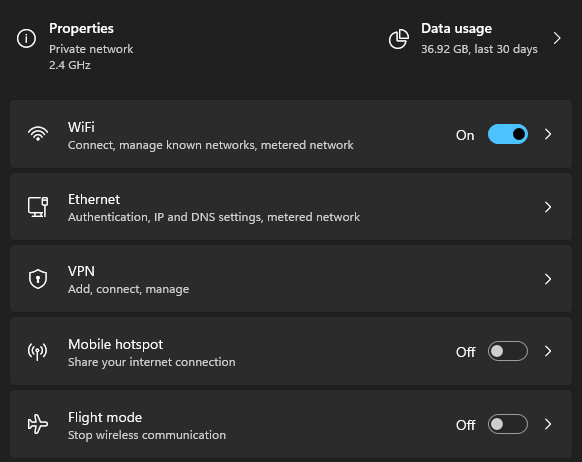
After your computer has turned on, open up the Settings application (not the legacy mess that is Control Panel!). Find an option on the sidebar (Windows 11) or on the main page (Windows 10) that mentions network and internet.

Great! On the network and internet screen you should see the network you’re connected to (if you’re not connected to anything, go connect to a network before continuing). We want to locate the option named mobile hotspot. Click on it!
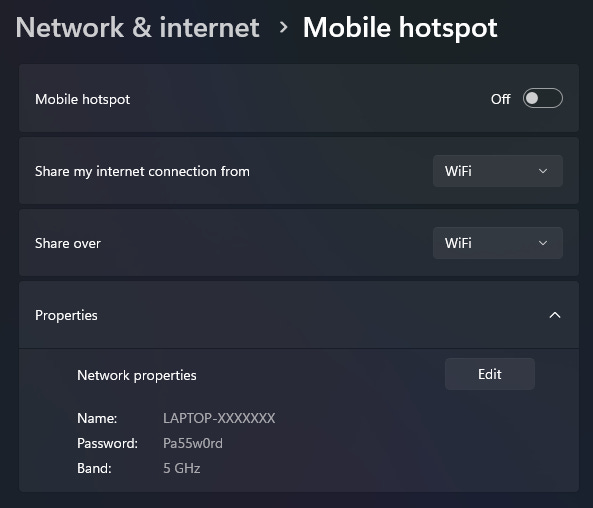
You’ll be greeted with the configuration panel for mobile hotspot. Depending on the device you’re connected to the internet from, you might have to change which option is selected in share my internet connection from, but we want to find the network properties section. Once you’ve found that, click Edit.
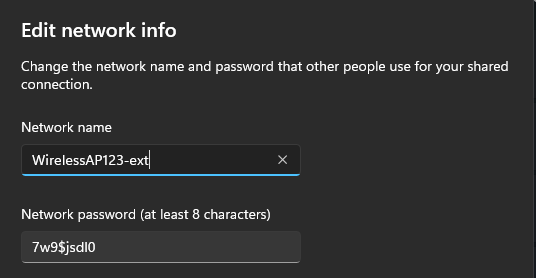
You can leave your network name as it is, but I would probably change it to communicate the fact that it’s a WiFi extender (for example, if your main network is called WirelessAP123, we could call the extender WirelessAP123-ext). Make sure that the network name you’ve chosen doesn’t interfere with any networks in your area. After that, I’d recommend changing your password to the same as your main network.
Finally, if you have the option, you can adjust your network band. I’d recommend keeping it at the default setting, but if you do want to change your setting, keep it in mind that 6GHz isn’t really that well adopted yet, 5GHz is mostly adopted but some gaming consoles like the Switch don’t have great support for it, and 2.4GHz ensures the widest compatibility. You should also note that 6GHz has the shortest range but has faster speeds, meanwhile 2.4GHz has the longest range but slower speeds.

Press Save, and everything will be saved. Now, let’s turn our hotspot on! You’ll see a toggle called power saving. Considering how you’re probably going to have this on 24/7, turn it off.

You’re now all set to go with your DIY WiFi extender! How cool is that?
Consider subscribing to the blog if you haven’t already, I make posts about tech tips as well as the Roblox Plugin Marketplace, and potentially Figma.
Add a comment: