March 15, 2024, 6:22 p.m.
A Contextual Recipe: Cassis and Sesame Focaccia and its ghosts

Bread On Earth

Cassis and Sesame Focaccia and its ghosts
A non-revolutionary idea: Focaccia, an Italian bread with endless regional variations, is exquisitely adaptable. It’s a great canvas for experimentation and innovation because of its flexibility of size, shape, ingredients and use, and its ability to range from crisp to custardy. It also takes almost zero dough handling skills. But if we consider how the basic material of bread works, both biologically and culturally, all breads are adaptable. It’s why bread is so difficult to define or comprehensively study, and why as people amble across the world, of their own volition or through force, the breads around them begin to change. It’s an ancient but moving target.
CONTEXT
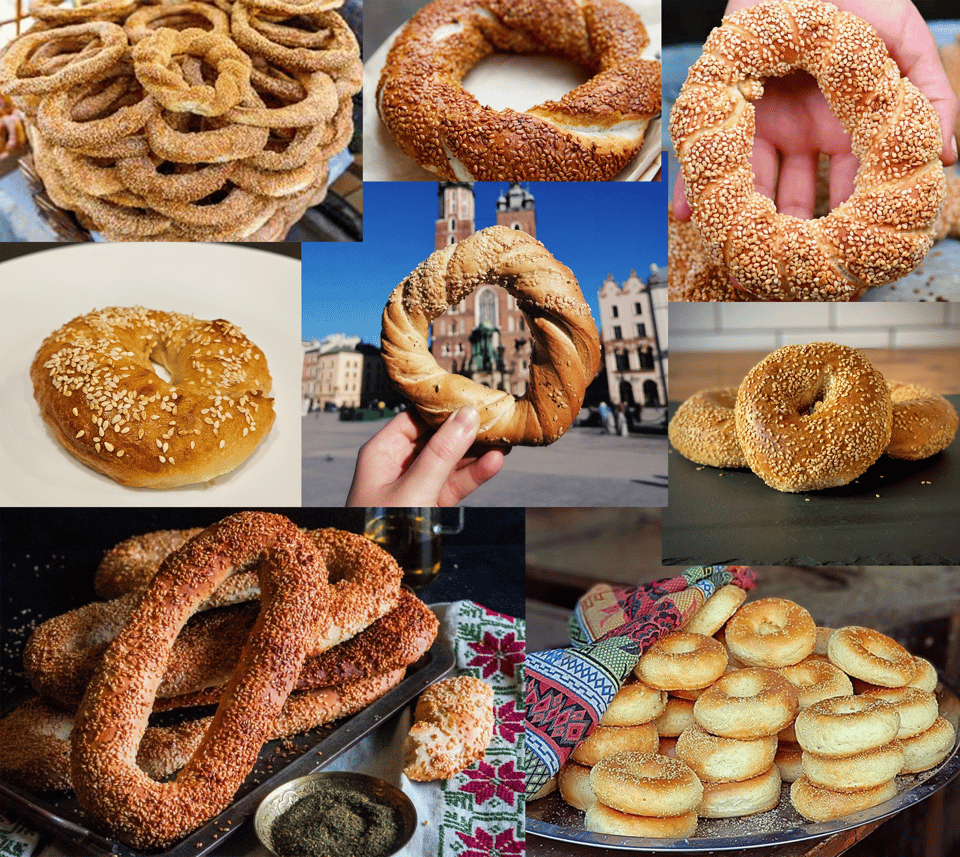
Everything comes from somewhere (and someone) else. This particular variation of focaccia, which is brushed with reduced cassis (black currant liqueur) and topped with sesame seeds, is inspired by the ringed seeded staples Palestinian ka’ak Al-Quds and Turkish simit, which themselves are subtle variations of each other and are reminiscent of breads that go by different names and live in distant places. Within this subspecies, one bread leads to another through a historical trail that spans millennia and maps the journey of goods, people and religion. Döppelgangers include Greek koulouri, Polish obwarzanek, Eastern European bublik, Jewish sesame bagels, Kashmiri telvor and girde naan of the Uyghurs in Northwestern China. All of these are leavened bread rings that are traditionally boiled, topped with sesame seeds, and then baked.

Reem Kassis’s article “Ka’ak, and The Case for The Ancient Arabic Origins of the Bagel'' does a lot of heavy lifting to track the origins of these breads back to the staple popular in Palestine, where it has been sold for lifetimes by vendors throughout the streets of Jerusalem. Similar to pizza and bagels in New York, many claim that ka’ak made anywhere but this holy city pales in comparison. Unsurprisingly (but still maddeningly), references to ka'ak outside of Palestine often refer to it as "Jerusalem bagels", a distortion of reality and paltry attempt at diluting and diffusing a lineage and identity for Western legibility.
For those living under apartheid in the West Bank (now and prior to Israel’s relentless assault on nearby Gaza that has created the current conditions for famine there) ka’ak from Jerusalem is a treasure, a symbol of a historic and resilient culture, sometimes even smuggled in through the apartheid walls for those barred by the Israeli military from accessing the city.
As is made clear by the following recipe’s bastardization, I don’t believe that traditional breads are inherently superior to new inventions and iterations, despite them holding so much meaning for many who make and eat them - so long as what comes after doesn't do away with what came before. To me that feels like lying, and is both boring and a missed opportunity.
Breads like those this focaccia references (and like the many revelations of focaccia itself) illustrate well the challenge (and, maybe, futility) of proving culinary ownership in a world where humans are forcibly displaced, rely on one another for trade, and take inspiration from neighbors, captors and captives. These bread relatives are how I travel through time and place and see whose stories are embedded in each other's.
Making bread is always some kind of act of devotion. When you do it, who and what it’s honoring is of course up to you. This focaccia is obviously not ka’ak. It’s not simit, or koulouri, or any of the other cousins. It’s an homage, made in part because focaccia is like a flag awaiting adornment and in part because bread keeps the past alive while tracking the effects of time and place.
WHAT WE’RE MAKING
Focaccia is a leavened flatbread, which is a bit of an oxymoron, but it’s also why it's one of the more prevalent flatbreads found in Europe and North America, where leavened loaves are generally prized above unleavened ones like tortilla and roti (both in their visibility on menus and the prices expected of them). Loaf breads are often considered food items unto themselves in these regions, whereas unleavened flatbreads are frequently used in the mechanics of a meal, functioning, along with hands, as utensils.
Maybe this accounts for some of the difference, though it doesn’t take a long hard look to see that leavened breads are historically made with wheat, which has the chromosomal structure to accommodate a nice fluffy vertical rise, and which grows well in areas populated by wealthy, whiter nations…but that is a topic for another time.
This said, popularity easily breeds bad quality, and there are tons of subpar focaccias. Please don’t bother making another one. After baking, focaccia should still feel buoyant and alive, it should retain its squish factor, it should hit somewhere between moist cake and French fry, with chew. This recipe accomplishes that: the result of over a decade of focaccia-baking, still a pretty standard formula that uses some wholegrain (I like the flavor and tooth that it lends the final loaf) and semolina (it gives the dough strength and the final product a custardy finish and yellowed hue), with a dose of olive oil to keep things lubed up. Thanks to the cassis, which is often distilled with an assortment of botanicals, the kitchen will smell like cinnamon toast while baking.


Variations and Substitutions:
-I’m providing variations for yeasted and sourdough focaccias. I almost always go with the latter, but in a pinch the yeast works wonders (after years of predominantly baking with sourdough it feels like a cheat code) and makes a more convenient and extremely enjoyable bread. The yeasted dough will grow more in volume and faster, and is a little more delicate during the later part of the mix, so handle with some care. I always find the sourdough version has a slightly better chew and lasts longer on the counter. Feel free to split the difference and throw a pinch of yeast into the sourdough version (add with the dry ingredients) for the best of both worlds. No judgment. You may be able to cut rising and proofing times a bit.
-You can sub the reduced cassis for grape or pomegranate molasses and a touch of honey. This is much more authentic anyway, if you care about that kind of thing. Add a teaspoon or two of honey to 3 tablespoons of molasses. Loosen up with a splash of water if it's too thick to drizzle easily.
-Flour: I use stone-milled flour from Ground Up Grain and Farmer Ground Flour. Stone-milled flour tends to be a little thirstier than its roller-milled alternatives (like King Arthur and other widely available – and still worthwhile – flour brands). Keep this in mind depending on the flour you’re using, and feel free to hold a bit of the water back when you’re first mixing to make sure the dough doesn’t turn into a batter. You can add it in later. Similarly, you can use more all purpose or bread flour in place of the whole wheat but I’d recommend you reduce the initial water mix to 365g, adding more as needed throughout the mix to reach a stretchable but not gloopy (batter-like) consistency.
Now go ahead, listen to Jerusalem by Emahoy Tsege Mariam Gebru while you mix the dough and write to me with any questions.
RECIPE
Cassis and Sesame Focaccia (after ka’ak, simit)
Yield: 1 9x13” pan or 12” round
260g all purpose or bread flour
125g whole wheat flour
55g semolina flour
375g water
22g olive oil
70g sourdough starter, active (mine is half whole wheat, half rye)
OR 2g instant yeast
10g salt
10-15g water
To top:
2-3 tablespoons reduced cassis (recipe below)
Plenty of sesame seeds
If using sourdough:
Feed your starter with your preferred flour (mine is a whole grain starter made with rye and whole wheat) so that it’s nice and active when you’re ready to bake. If you’re taking it out of the fridge to use in the recipe, feed it a couple times before building it up for this moment.
Combine flours and 375g of water in a bowl and stir well with your (moist) dominant hand until combined. Let this rest for 20 minutes under a cloth (this step prehydrates the flour and builds strength in the dough but isn’t necessary - skip it if it doesn’t work for your schedule and move directly to adding the sourdough).
Return to the dough and add the sourdough, splashing in a bit of the reserved 10-15g water to help combine. Squeeze the dough through your wet fist and watch it spurt out between your knuckles. Keep doing this until the mass is cohesive. Add the salt and toss with the remaining water and mix some more, pulling the dough up from the bottom of the bowl and folding it over itself for a couple minutes. It will tear easily and feel wet. That’s okay. Try to tuck the dough into something resembling a ball. Scrape the mess off your hand and add what's salvageable back to the dough mass. Cover with a towel and set a timer for 20 minutes. Make a note of the time that you completed the mix. You will want to put your dough into the fridge about 4.5 hours from then.
If using yeast:
Mix the flours, yeast, 375g water, and olive oil in a bowl, and use your (moist) dominant hand to combine. Cover with a towel and let rest for 20 minutes (this step prehydrates the flour and builds strength in the dough but isn’t necessary - skip it if it doesn’t work for your schedule and move directly to adding the extra water and salt).
Return to the dough and add in the salt and a splash of the extra 10-15g water. Squeeze the dough through your wet fist and watch it spurt out between your knuckles. Keep doing this until the mass is cohesive. Mix some more: pull the dough up from the bottom of the bowl and fold it over itself for a couple minutes. It will tear easily and feel wet. Add the remaining water as you go in drizzles, if you still have some. Try to tuck the dough into something resembling a ball. Scrape the mess off your hand and add what's salvageable back to the dough mass. Cover with a towel and set a timer for 20 minutes. Make a note of the time that you completed the mix. You will want your dough in the fridge about 4.5 hours from then.
For both sourdough and yeasted versions:
Do a fold* every 20 minutes for the first hour (3 folds total), then 1-2 more as needed over the following hour, every 30 minutes or so. Your goal is to get the dough to a point where it can stretch during your folds without tearing, and have a relatively smooth surface when pulled taut. At this point I like to transfer the dough to a baking pan with high enough sides to accommodate a roughly 40% increase in volume. Let the dough rise for 2-3 hours more, or until it has grown in volume and is wobbly, a bit marshmallowy. This usually happens between 4 and 5 hours from the initial mix, depending on how warm it is in your kitchen.
I like to do a neat, sweet, gentle little fold at the end, mostly tucking the edges beneath themselves to tighten the structure. Drizzle with a little olive oil, cover with plastic wrap and place the dough in the fridge for an overnight rest. It will rise just a bit more in that time. Chill for 12-24 hours (the longer you go, the more pronounced the sour flavor will be, if you're using sourdough).
When ready to bake: Very generously oil a 9x13” pan or well-seasoned large cast iron (mine is 11" inches across the bottom). You can sprinkle it with a layer of sesame seeds. Carefully pour the dough (use wet or oiled hands to gently coax it out from its bed) onto the pan. We want to disturb the distributed gasses within the dough as little as possible. Be nice.
Cover the pan with a towel, plastic wrap or a lid and rest for 1 hour. At this point you can check back in - if the dough has not relaxed outward much, very gently prod it towards the edge of the pan. It will continue to grow, so don’t do too much. (If your kitchen is cold, you can put the dough in a closed oven with a bowl of warm water for this phase).
Proof another 2 hours, then check back. This is usually when I preheat the oven to 485F, with one rack on a lower rung and another on a higher one. I like to place a small pan on the upper rack to preheat and use for steam (will get to this shortly), but it's not totally necessary.
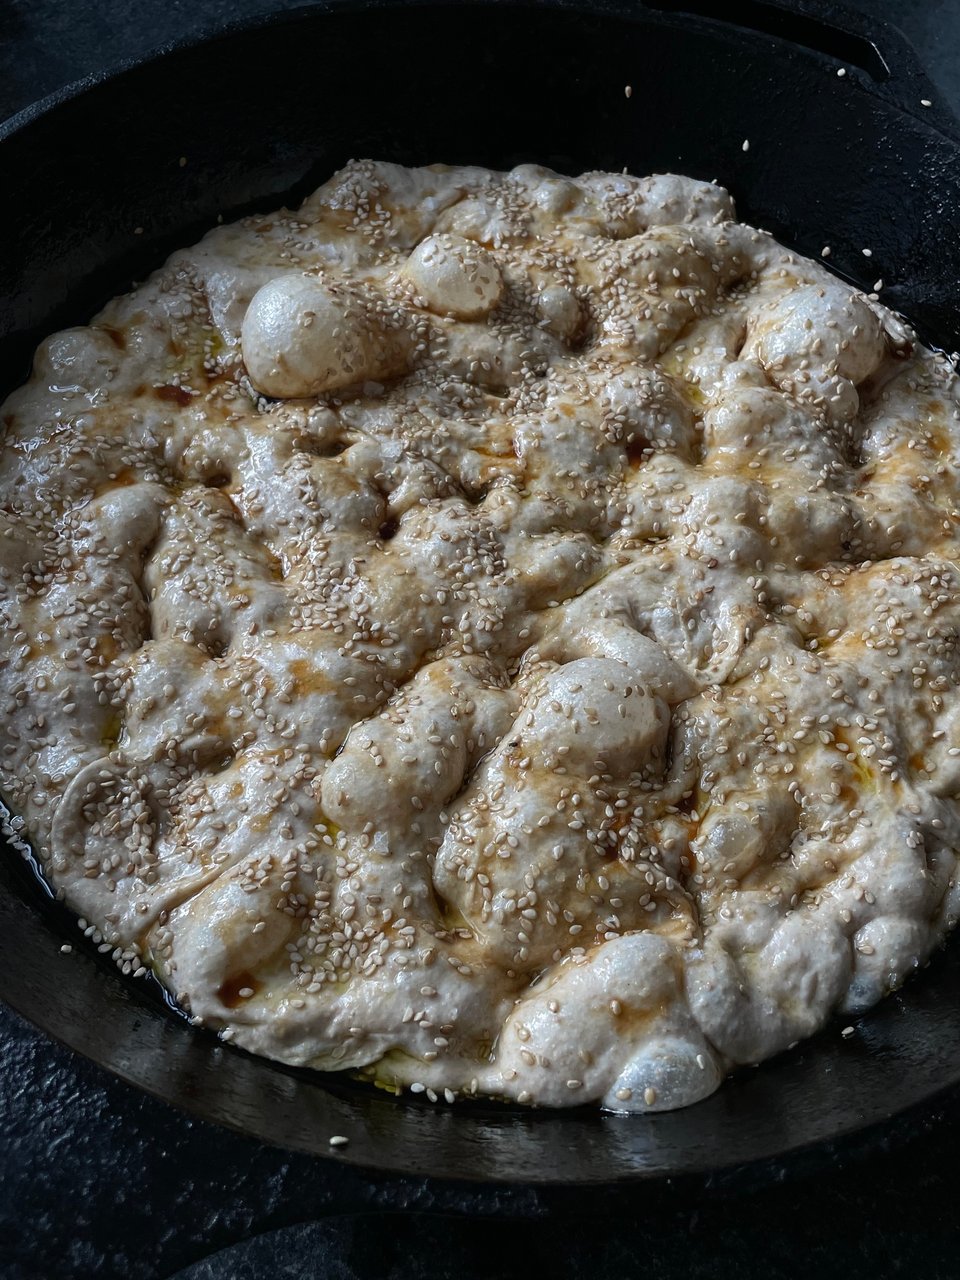
When ready to bake, the dough should jiggle like a very warm marshmallow, a quivering mass. Drizzle with a bit more olive oil and a couple tablespoons of your reduced cassis. Lightly spread with your fingers or a pastry brush then top with flaky salt.
If using steam (it ensures a nice rise and crisp crust but you can forego it and all will be well), take a few ice cubes and toss with a tablespoon or two of water. Open the oven, place the bread on the lower rack, pour the ice water and cubes into the preheated extra pan, and quickly close the door.
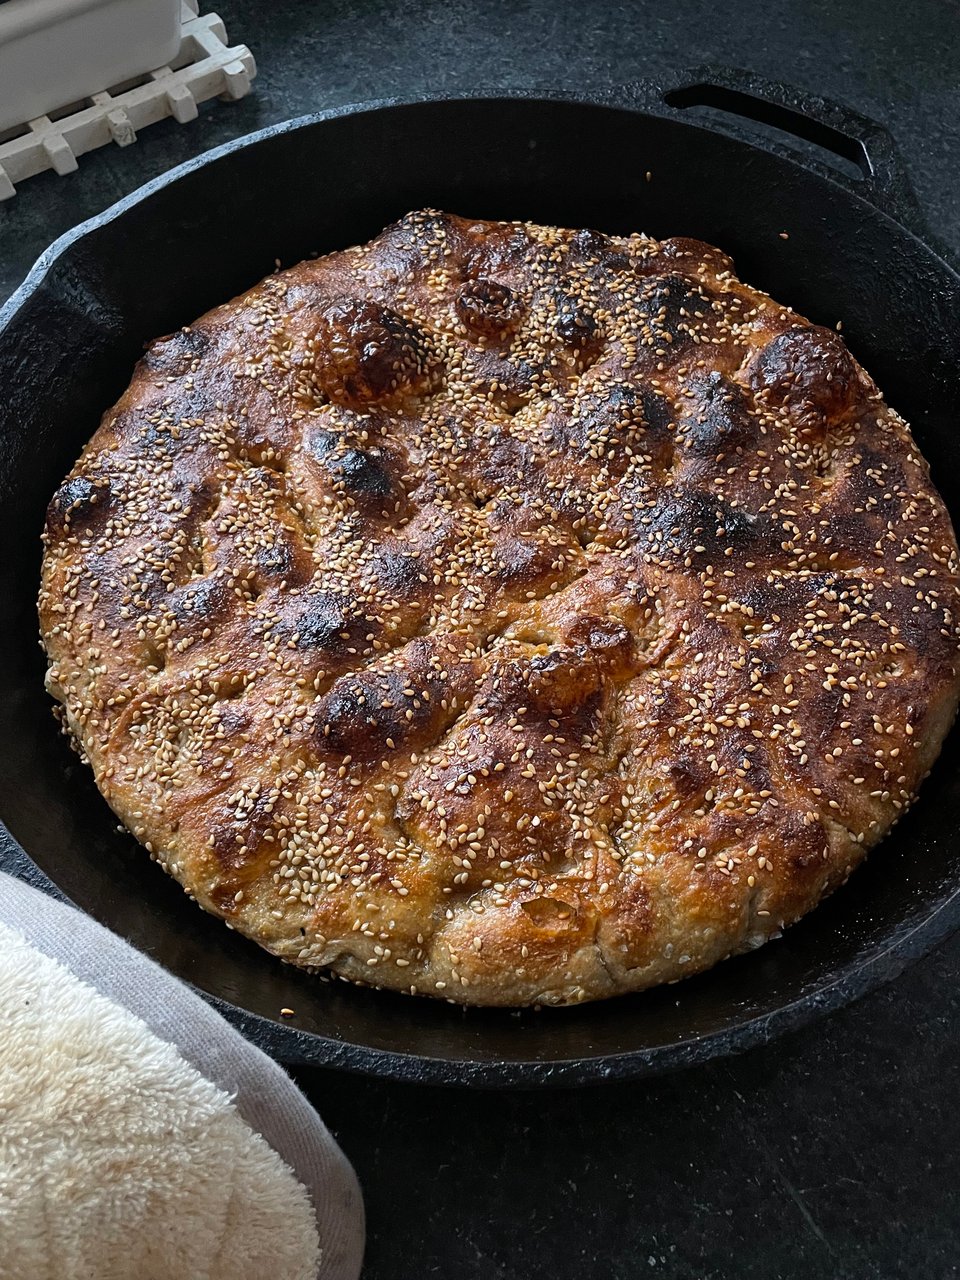
Bake for 20-26 minutes, or until the edges and bottom of the bread are golden. The cassis browns quickly, don’t be misled by this. The bottom moves more slowly. I usually bake for the full 26 minutes for a perfect crust.
Brush with some olive oil after removing from the oven for some extra shine, if you want.
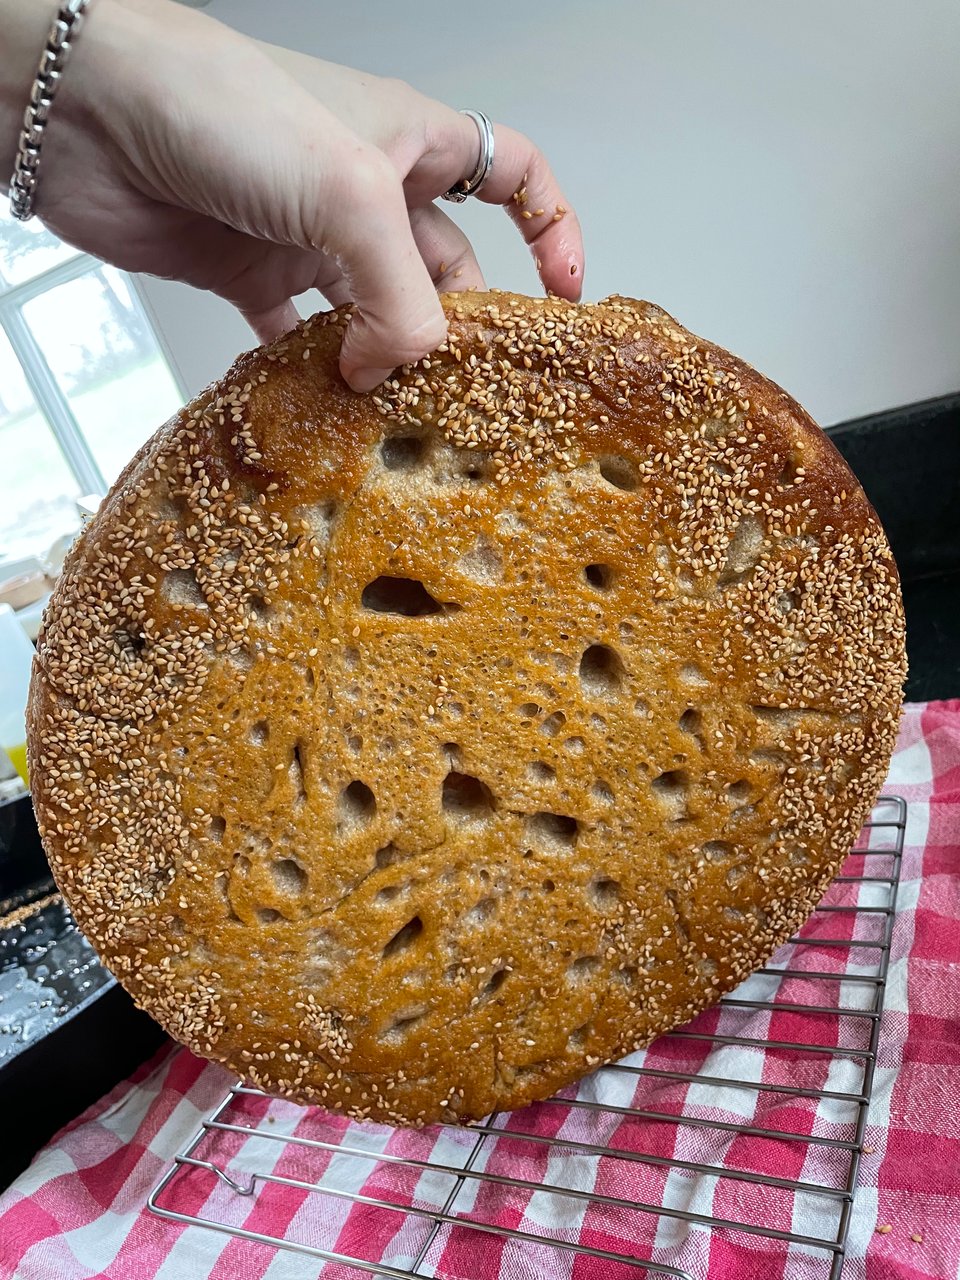
Cool for 10-20 minutes then carefully move the bread out of the pan and onto a cooling rack (tip: I put a towel below the rack to collect condensation so the bottom doesn’t get soggy. Even better, cool it on a gas range stove top).
This bread is best eaten within a day but freezes pretty well.
*A fold is this: with wet hands, pick up the far edge of the dough by scooping your fingers all the way underneath it, scraping the bottom of the bowl with the tops of your fingernails. Draw the edge up towards the ceiling and you. Fold it over itself, placing the edge on the opposite side of the bowl as where you started. Turn the bowl 180 degrees and do this again. Then repeat on the two remaining sides of the dough. I like to finish by turning the whole lump over in the bowl, bottom to top, and tucking the edges in. A bit of surface tension helps build strength in the dough.
Reduced Cassis:
Simmer 2/3 cup cassis (I use Current Cassis) in a small saucepan on medium heat for 5-10 minutes until dramatically reduced, leaving a scant 1/4 cup. This happens faster than you'd think. Let cool and store in a glass jar until ready to use. It will keep at room temperature for some time.

with love
Lexie
©Bread on Earth, 2024. New York.